The Identities Screen
Manage Groups
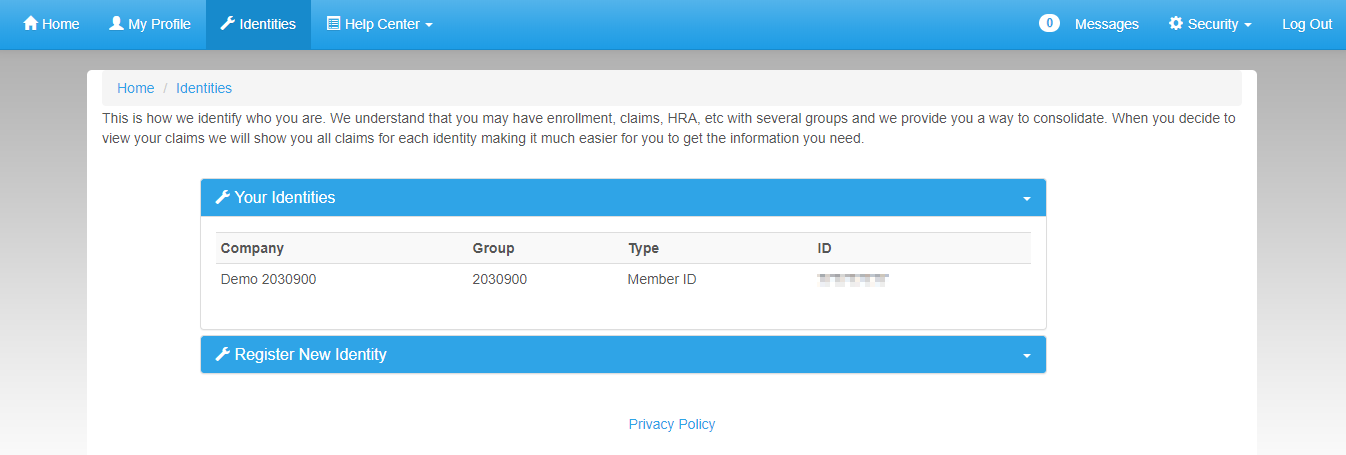

The Identities The manage groups screen in myHealth allows users to add additional employer group/university identities to the existing myHealth account. In the event that a member has changed groups or has a secondary group for separate benefits, other identities can be added on this screen to allow access to the benefits for all identities from one myHealth account.
Your Identities

- All existing identities are listed in this panel.
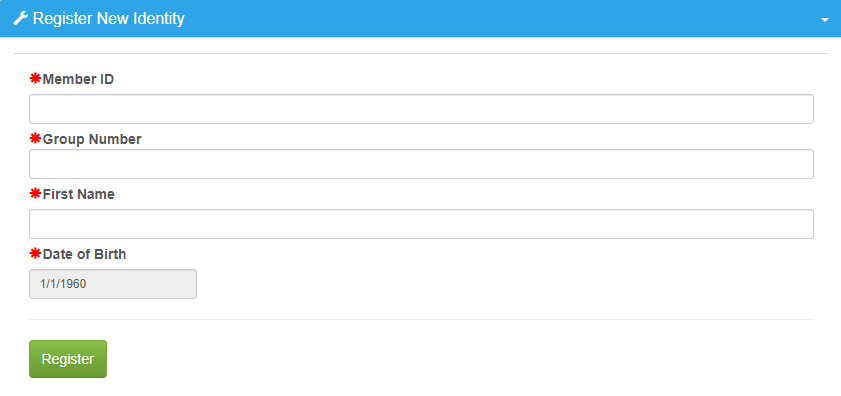
Register New Identity
an admin to add/edit a client group's setup within the myHealth system. The group setup will determine what links/portals the members of that group see when they login to myHealth.

Add Group
An * denotes a required field.
Add a new group to the myHealth system by filling out the required fields on the form.
- Edit Existing Group: Not used for NEW groups. See the section below for Edit Group.
- Assign Portals: Expand to select the portals/links this client group should have access to.
- Organize Group Portals: This section will not be available until the entire portals have been assigned and after the entire new group record has been saved.
- Once available, this area can be used to reorder the portals assigned.
- Portal Plan Restrictions: This section will not be available until the entire portals have been assigned and after the entire new group record has been saved.
- Once available, the existing portals can be restricted to a specific plan within the group, if required.
- Group Name: Enter the name of the client group. This is what will display as the group name to the members.
- Group Number: Enter the exact group number from the core claim system for this client group.
- If the number is not entered correctly, the system will not be able to match members to this record.
- Enabled: Check this box to make this group record active/enabled in myHealth.
- Disabled groups will not allow members for that group to register or use the system.
- Address: Enter the address for the group. This is for reference only.
- Address 2: Enter the address line 2 for the group. This is for reference only.
- City: Enter the city for the group. This is for reference only.
- State: Enter the state for the group. This is for reference only.
- Zip Code: Enter the zip code for the group. This is for reference only.
- Set Custom HCBB Code (Optional): Select this option and enter a code for the Healthcare Bluebook (HCBB) / MyDecision SSO portal.
- This is only used if the group has elected one the HCBB portals.
- Implementation or Client Services will provide the code to use for this group in the setup documentation.
- Create Demo Account (Optional): Select this option to have the system create a demo member account for this group.
- Two additional fields will appear with the username and password assigned for the demo account.
- This is a rarely used option, but can be requested by an Implementation or Client Services team member to see/demo the portal for the client.
- Add ID Card Alias (Optional): Enter a group number alias if this group has a different group number on their ID cards. This will allow members to create a myHealth account with the alternate group number or the standard group number.
- This is the case for some Anthem or BCBS groups.
- The group setup documentation will specify the alias group number id required.
- Click the Save button to complete the new group addition
- Click the panel header text "Register New Identity" to open this section.
- Enter the required information for the new identity. This inform can be found on the ID card for the group being added.
- Click the Register button to complete the identity registration.
- Once the new identity is registered, it can be accessed from the HOME page and any benefit links will be displayed under that identity's panel.
Related pages
| Content by Label | ||||||||||||||
|---|---|---|---|---|---|---|---|---|---|---|---|---|---|---|
|