Last Updated v11.3.0
Export Form Jobs - These screens allow the TPA user to build an export job for any queue in the system. Once constructed and activated, the export job will pull all forms in the selected queue, and export them to a text file with the selected elements.
| Info | ||
|---|---|---|
| ||
When forms are exported from a queue, they are marked as completed by the system. They will no longer be available in the queue to be worked manually. |

- Add a new export job using the Add
 button on the top right section of the toolbar.
 - Search for an existing export job to edit using the filters above each column.
- Click on the desired export job in the list to edit.
Export detail
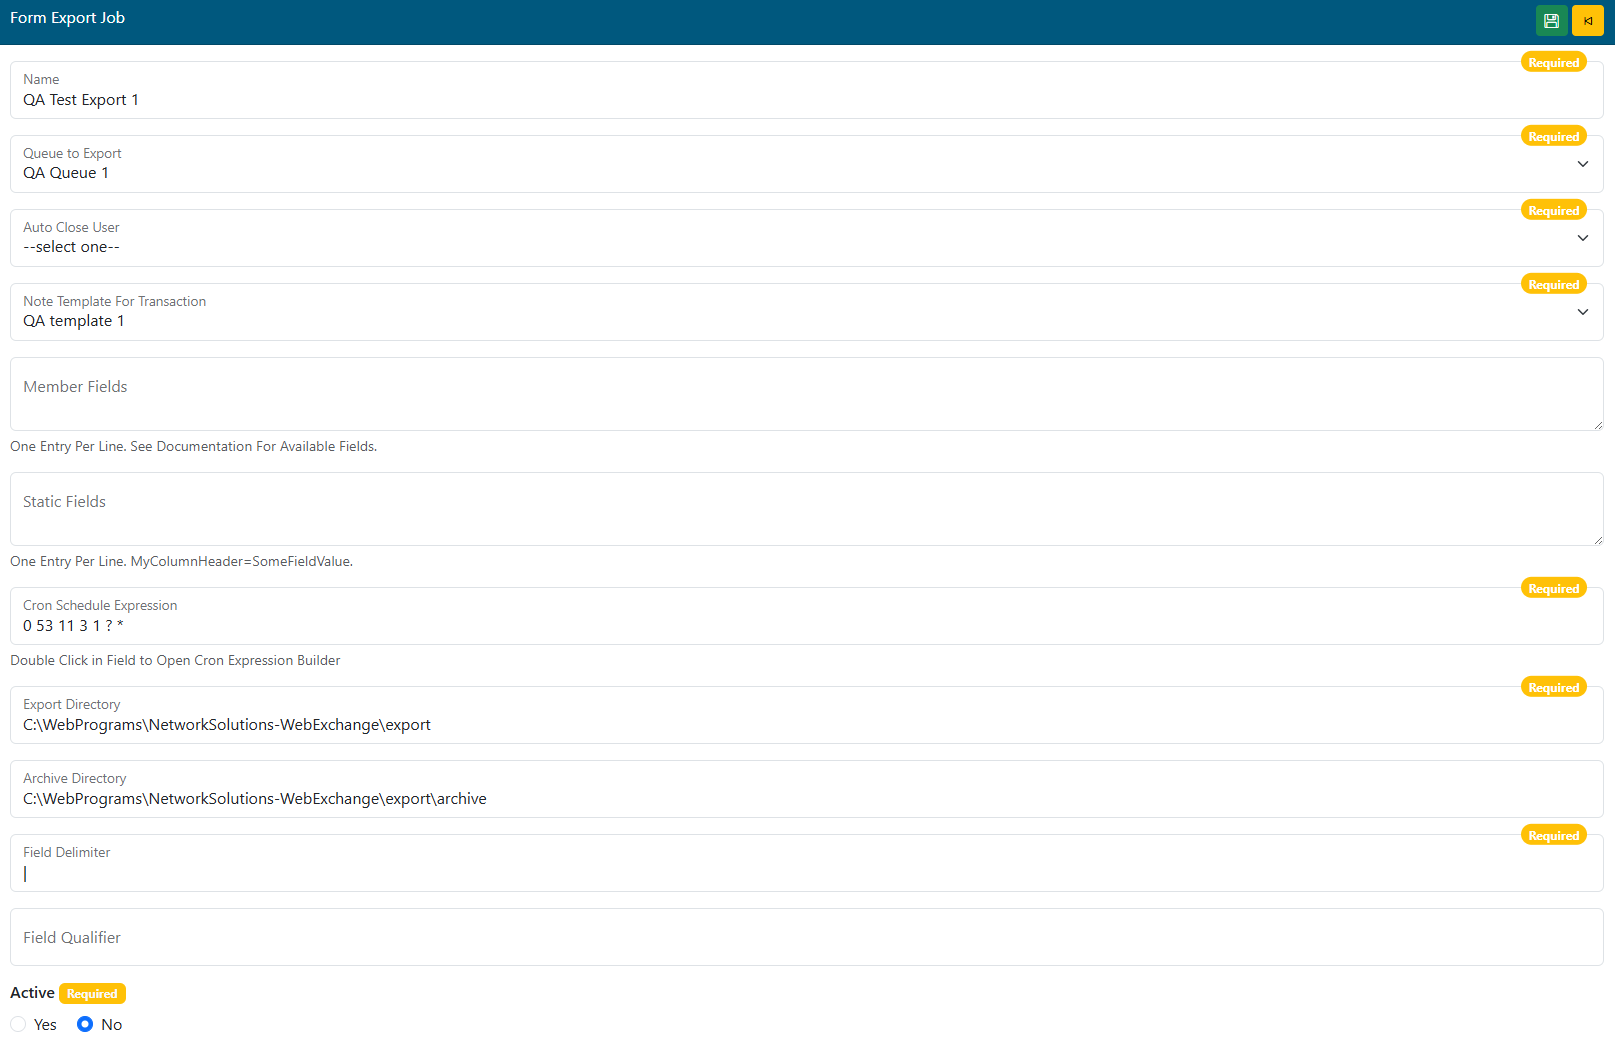
- Name - Add/Edit the name of the export job.
- Queue to Export - Select the Web eXchange queue that this job will pull forms from.
- Auto Close User - What user account name will be shown on the transaction when the system closes it after export.
- A generic or admin user account is typically created by the system admin team for this purpose.
- Note Template For Transaction - Select a note template to stamp the text on the transaction when closed.
Member Fields - Not Used in this version of Web eXchange.- Static Fields - Enter (one per line) any fields tat will be statically inserted into every record in the export file.
- Format: FieldName=FieldValue (TransCode=ADDRESS)
- Cron Schedule Expression - Double click for the Cron expression builder, or enter a manual expression.
- This is the schedule by which the export job will run.
- Export Directory - The local or network directory where the file(s) will be exported for pickup.
- Consult the System Admin team for more information.
- Archive Directory - The local or network directory where the file(s) will be stored for archival.
- Consult the System Admin team for more information.
- Field Delimiter - Enter the character to be used to delimit the fields in the export file.
- Field Qualifier (Optional) - Enter the character to be used to qualify text entries.
- Active - Is this export record active.
- Static Fields - Enter a field name (header) and the value that will be populated in that field for each record in the file. Example 1: TransCode=ADDRESS. Example 2: Contract=12345.
- CRON Schedule Expression - Double click the field to open the CRON builder. Enter how often this job should run.
- Export Directory - Enter the UNC path of the directory to export the files.
- Archive Directory - A UNC path that can be used to keep an archive copy of all files exported.
- Field Delimiter - The text delimiter used between each field in the file. Example: | or ,
- Field Qualifier -The text qualifier to be used if needed. Example: "
- Active - Yes/No - Is this export job record active?