Last Updated v11.3.0v1
Export Form
JobsJobs - These screens allow the
TPAAdmin Center user to build an export job for any queue in the system. Once constructed and activated, the export job will pull all forms
i nthein the selected queue, and export them to a text file with the selected elements. The exported text file can be used by an external process or system to handle the form processing rather than manual processing from a queue.
| Info | ||
|---|---|---|
| ||
When forms are exported from a queue, they are marked as completed by the system. They will no longer be available in the queue to be worked manually. |

- Add a new export job using the ADD
button Add
 button on the top right section of the toolbar.
 - Search for an existing export job to edit using the filters above each column.
- Click on the desired export job in the list to edit.
Export detail
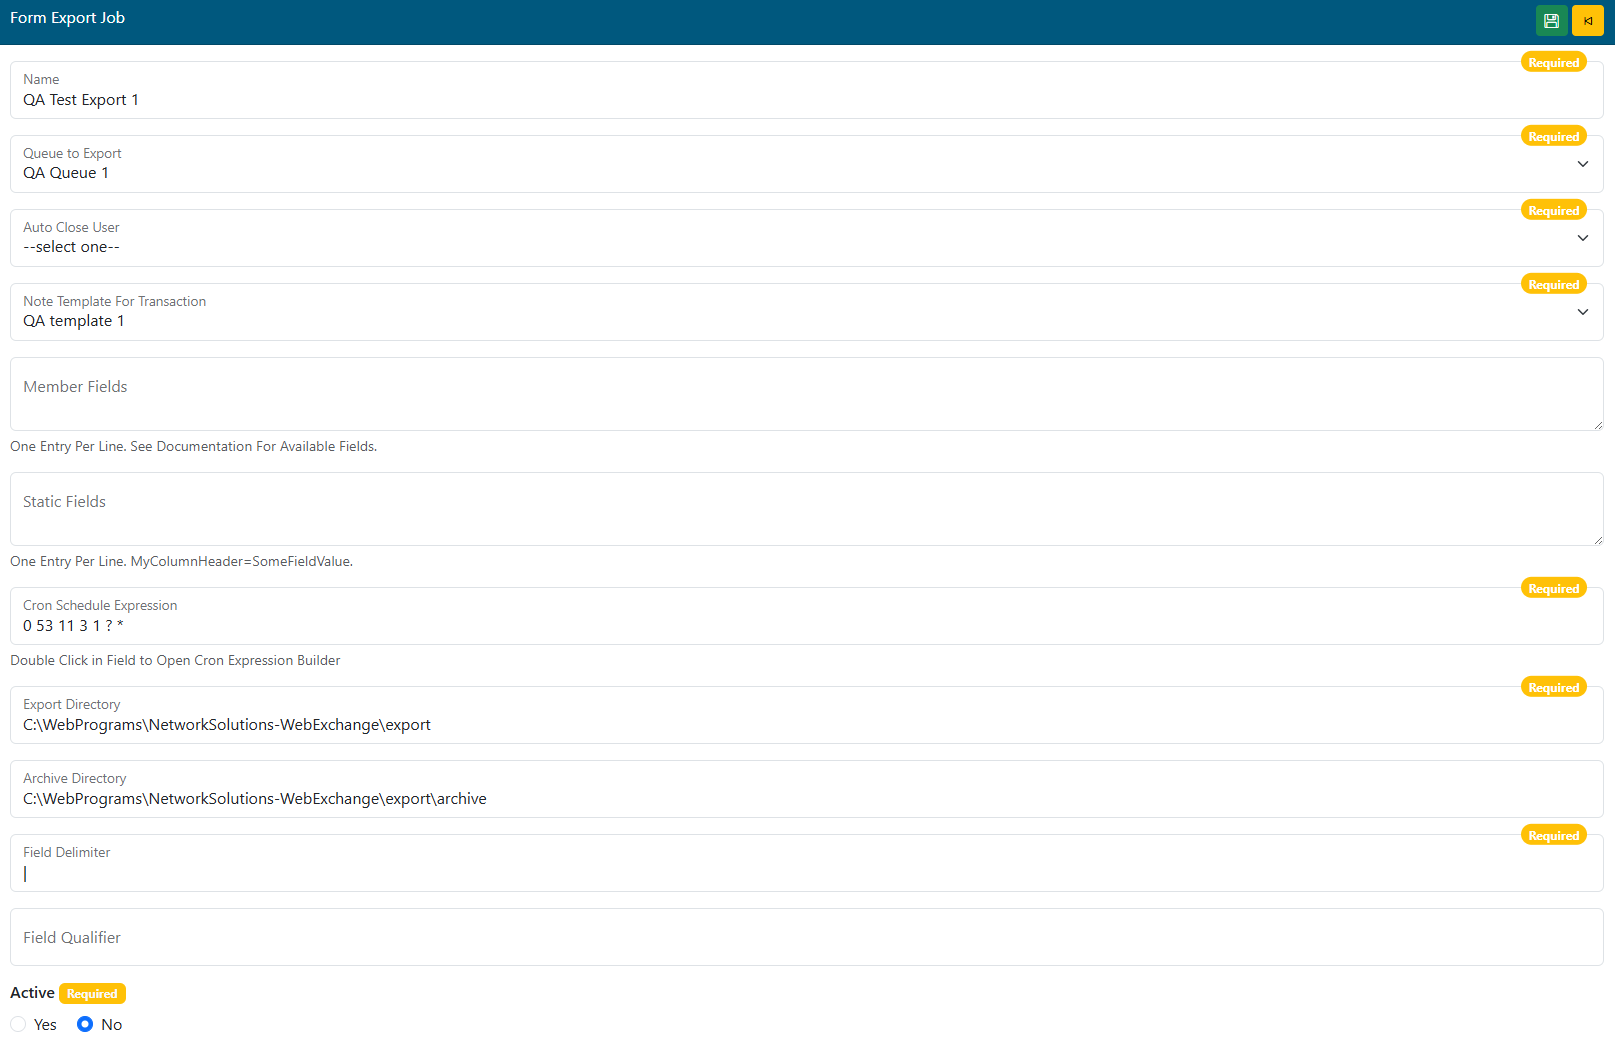
- Name - Add/Edit the name of the export job.
- Queue to Export - Select the Web eXchange queue that this job will pull forms from.
- Auto Close User - What user account name will be shown on the transaction when the system closes it after export.
- A generic or admin user account is typically created by the system admin team for this purpose.
- Note Template For Transaction - Select a note template to stamp the text on the transaction when closed.
Member Fields -Enter (one per line) the web service fields that should export in the text file for each form record exportedNot Used in this version of Web eXchange.- Static Fields - Enter (one per line) any fields tat will be statically inserted into every record in the export file.
- Format: FieldName=FieldValue (TransCode=ADDRESS)
- Cron Schedule Expression - Double click for the Cron expression builder, or enter a manual expression.
- This is the schedule by which the export job will run.
- Export Directory - The local or network directory where the file(s) will be exported for pickup.
- Consult the System Admin team for more information.
- Archive Directory - The local or network directory where the file(s) will be stored for archival.
- Consult the System Admin team for more information.
- Field Delimiter - Enter the character to be used to delimit the fields in the export file.
- Field Qualifier (Optional) - Enter the character to be used to qualify text entries.
- Active - Is this export record active.
| title | Member Field Options |
|---|
id – Internal Member ID
relationship – Description of the relationship for the member to the employee
securityRelationship – standardizes the relation for WE: self, spouse, child
relationshipCode – internal code from the claim system
clientKey – Internal group id
ssn – member ssn
eeSsn – employee ssn
alternateId – alternate id of the member
idcardMemKey – member key sent to the id card vendor for viewing the id card
sequence – dependent sequence number
firstName – First name
lastName – last Name
middleInit – middle initial
address1
address2
city
state
zipCode
sex – gender
phone
remarks
department – department code from the claim system
dateOfBirth
dateOfHire – Employee date of hire
status – this is the overall status- active
terminated – True when terminated on all plans False otherwise
dbDelimiter – The character that is used to delimit the id or clientKey if they are composite keys
- Static Fields - Enter a field name (header) and the value that will be populated in that field for each record in the file. Example 1: TransCode=ADDRESS. Example 2: Contract=12345.
- CRON Schedule Expression - Double click the field to open the CRON builder. Enter how often this job should run.
- Export Directory - Enter the UNC path of the directory to export the files.
- Archive Directory - A UNC path that can be used to keep an archive copy of all files exported.
- Field Delimiter - The text delimiter used between each field in the file. Example: | or ,
- Field Qualifier -The text qualifier to be used if needed. Example: "
- Active - Yes/No - Is this export job record active?