Last Updated v9.8.0
Main Menu -> System Admin → Departments |
Department Administration
The Departments area of system administration allows the setup or edit of core departments in IWS. Each department has its own structure in IWS (User access, document types, queues, queue rules, etc.) Departments are used to segregate the system into logical areas of workflow for a related business unit. Department examples: Legal, Accounting, Eligibility, COBRA, Claims, Provider Relations, etc. IWS is designed to be generic enough to use for any type of business and department within that business.
Department Search/List
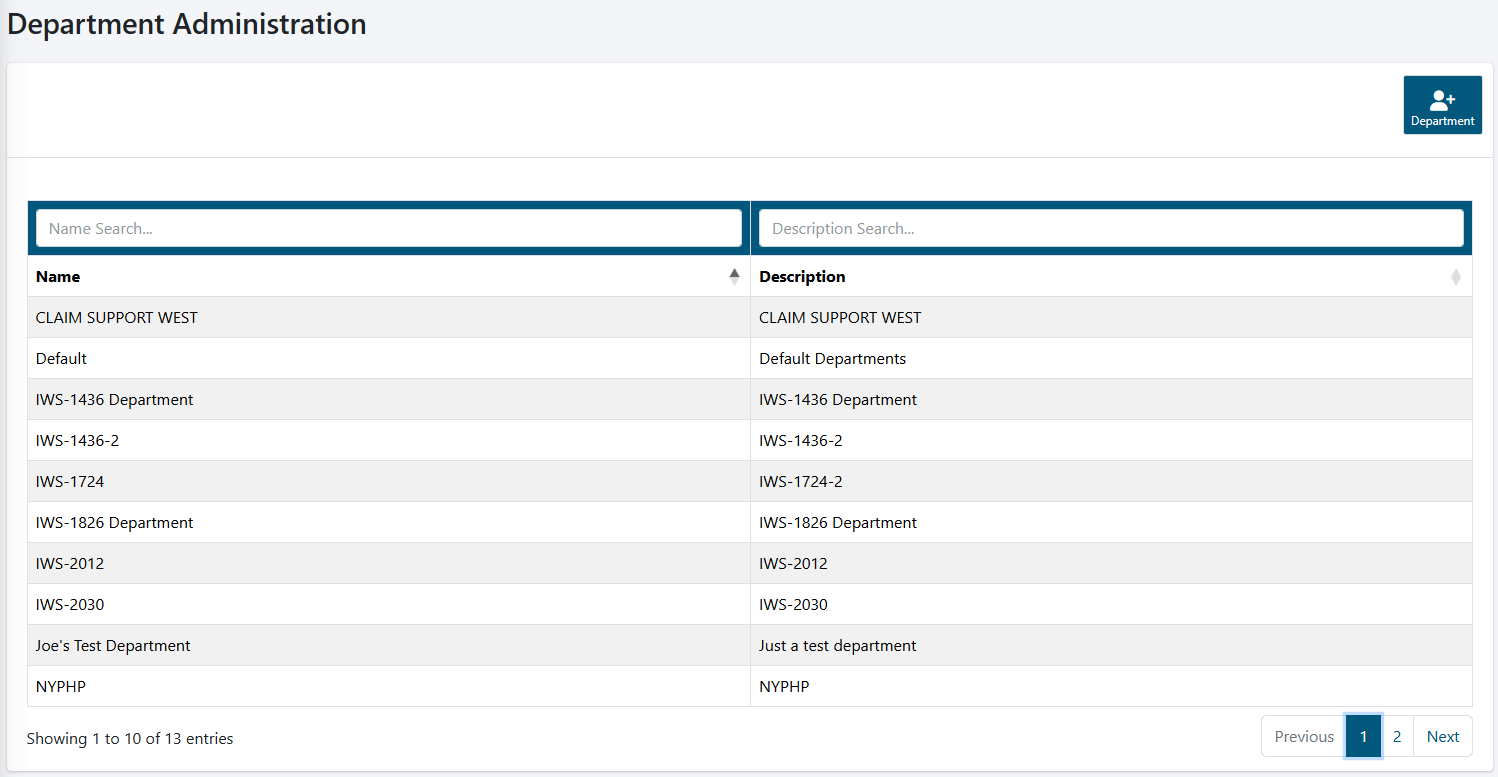
Use the list to find and edit an existing department. Use the +Department button to create a new department.

- Use the search/filter boxes at the top of the grid to narrow the list of Departments.
- The column headers can be clicked to sort each column. Click again to sort the opposite direction.
- Click on any Department record to open the edit screen.
Department & Sub Department Editing
The add/edit screen allows the system admin to add a new department, sub department, or modify and existing department. Sub departments can be created under any parent department. Sub departments contain all of their own permissions, document types, queues, etc., but are attached to the parent department for organization and visual alignment purposes. Sub departments can be nested under other sub departments.

Action Buttons
- Edit Parent: This button will load the settings and details for the parent department if sub departments exist or were selected from the list.
- Add Sub Dept: Adds a new sub department under the selected parent or sub department.
- Back to List: Returns to the department list.
Fields and Settings
- Sub Department List: If one or more sub departments exist, they will be listed individually below the main department name in the left section.
- Clicking a sub department will load the details for that sub department in the right section.
- If multiple sub departments exist, they can be nested further be dragging the name in the list under another sub department.
Department Details (Tab)
The department details tab lists the information for that department/sub department.
Action Buttons
- Save: This button will save any changes made to the department record.
Fields and Settings
- Department Name: Enter the name of the department/sub department. This is visible throughout the system.
- Department Description: Enter a description for what this department contains.
- Document Storage Path: Select an existing storage path for the documents under this department. Document Storage Paths are defined in a separate area of the System Admin menu and determines the physical disk/network path to where the documents will be stored for this department.
User Permissions (Tab)
This tab can be used to directly assign existing IWS users to this department. Only general department access can be assigned on this screen. See the Users menu item under the System Admin menu for more detailed user assignment. The department admins can also assign users to specific items within their department.
Fields and Settings
- Access: Toggle this field to ON to allow the specific user to access this department.
Security Groups (Tab)
This tab can be used to directly assign existing IWS security group to this department. Only general department access can be assigned on this screen. See the Groups menu item under the System Admin menu for more detailed group assignment. The department admins can also assign groups to specific items within their department.
Fields and Settings
- Access: Toggle this field to ON to allow the specific group to access this department.
Retention Rules (Tab)
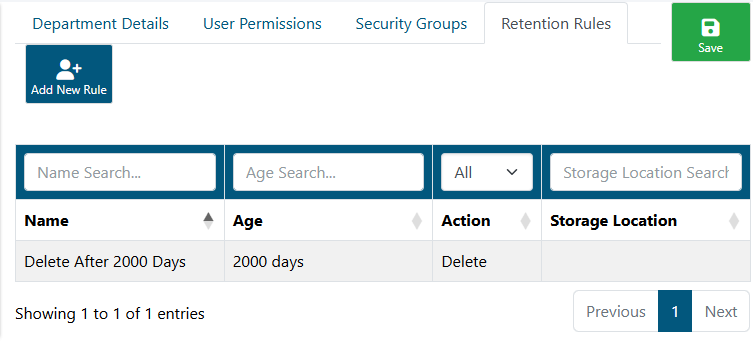
This tab can be used to add document retention rules for this department. Retention rules can be set to either move or delete documents after certain age criteria is met.
Retention rules added in this screen will not automatically take effect for this department. Rules must be initiated from each document type within the department. The department admins can choose to use a department defined rule from this screen on their document type(s), or build their own retention rule(s) on each document type. See the Department Admin - Document Type help section for more information.
Retention Rules Search/List

Use the list to find and edit an existing retention rule. Use the +Add New Rule button to create a new rule.
Action Buttons
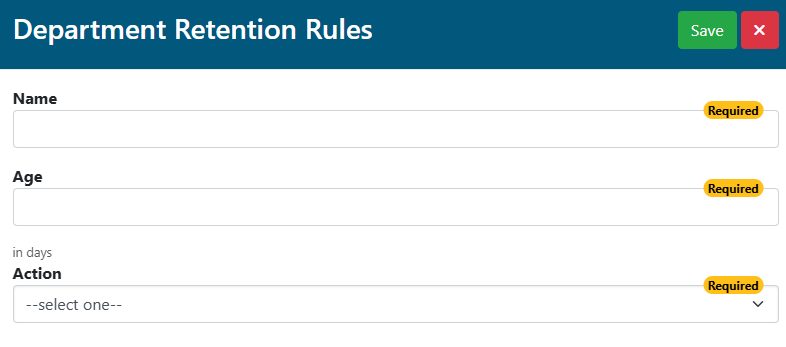
- Add New Rule: This button will open a window to add a new retention rule.
- Save: This button will save any changes made to the department record.
Fields and Settings
- Name: The Name of the retention rule. Use a name that will effectively describe what the rule does.
- This name will be shown on the Document Type Retention Rules are for the Department Admins to choose from.
- Age: After what age (in DAYS) should the retention rule process documents with the selected Action.
- Example: Enter 365 to have the system move/delete documents attached to this rule after 365 days/one year.
- Action: What action should be performed on the documents attached to this rule once the Age is met.
- Move: The documents will be moved to an alternate storage location, but will still be available in IWS.
- A Document Storage Location must be added in that System Admin screen to be selected here.
- Delete: The documents will be PERMANENTLY deleted from the IWS database and the physical disk storage location.
- Move: The documents will be moved to an alternate storage location, but will still be available in IWS.
- Doc Storage Location: The alternate archive storage location the documents will be moved to if the MOVE action is selected..
- Only Document Storage Locations that have the "Archive" flag will be listed.
- This option is only visible on screen if the MOVE option is selected.
