Main Menu -> My IWS → My Audits |
The My Audits section will show a list of queues that contain audited documents.
If a supervisor or auditor used the auditing module to perform an audit on a document(s) processed through any queue, and they send the audited document to the processor for review or correction, that document will appear in this special queue list.
Auditing Queue List

This queue list contains any queues and documents that have been audited and sent back to the processor for review. Only queues containing audits belonging to the currently logged in user will appear on the list.
- Use the search/filter boxes at the top of the grid to narrow the list of Queues.
- The column headers can be clicked to sort each column. Click again to sort the opposite direction.
- Select an audit queue to enter by clicking anywhere in that row.
Audit List

This list contains any documents that have been audited and sent back to the processor for review. Only audits belonging to the currently logged in user will appear on the list.
- Use the search/filter boxes at the top of the grid to narrow the list of Documents.
- The column headers can be clicked to sort each column. Click again to sort the opposite direction.
- Select an audit document to enter by clicking anywhere in that row.
- Return to the Audit Queue list (Audit Dashboard) by clicking the My Audits Dashboard button.
Audit Master

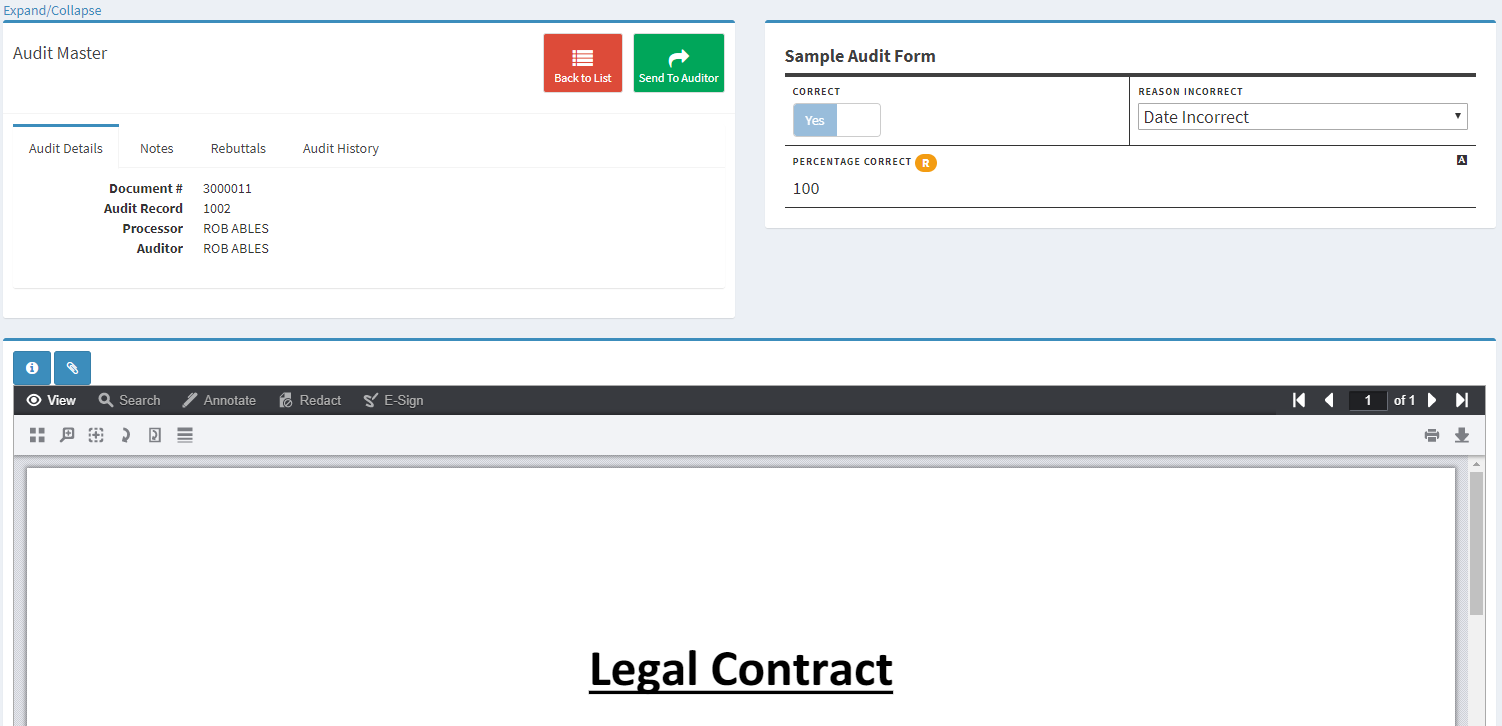
The Audit Master screen shows all information regarding the document that was audited by an auditor or department admin. This section will detail each area and tab of the audit master.
Action Buttons
- Back to List: Returns to the audit queue list.
- Send To Auditor: Once the processor's review/correction/rebuttal of this audit is complete, it must be sent back to the auditor to be reviewed and/or closed. This is the only way to remove the audit from the processor's audit queue.
Audit Master Tabs
Audit Details
This tab shows the informational details about the audit record.
Notes

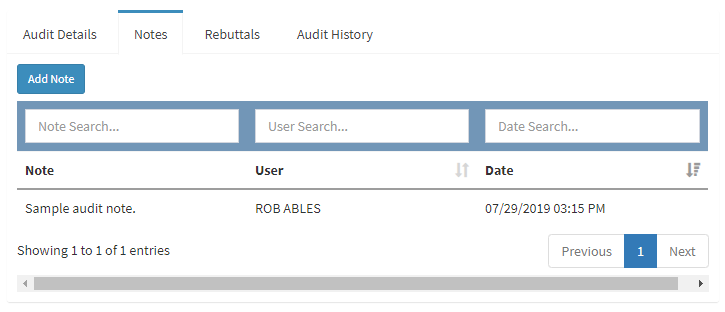
This tab contains notes from the auditor and allows the processor to enter any notes in response to the auditor.
- Use the search/filter boxes at the top of the grid to narrow the list of Notes.
- The column headers can be clicked to sort each column. Click again to sort the opposite direction.
- Use the Add Note button to add a new note to the audit.
- **At least one note must be added in response to the auditor before sending it back unless a rebuttal is being added.
Rebuttals

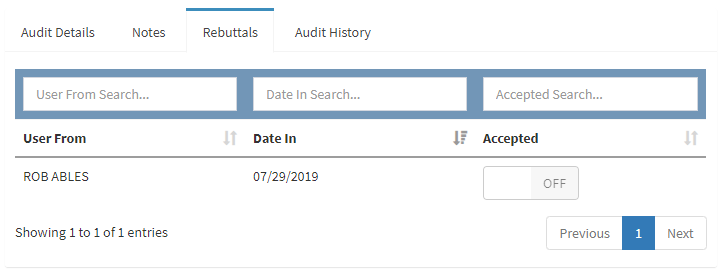
This tab contains any rebuttals created by the processor. A rebuttal can be created when there is a dispute over the original audit results. If you feel the work was completed correctly, a rebuttal and reason can be added to the audit.
- Use the search/filter boxes at the top of the grid to narrow the list of Rebuttals.
- The column headers can be clicked to sort each column. Click again to sort the opposite direction.
- Click any row to show the rebuttal details.
- Use the New Rebuttal button to add a new note to the audit.
- **Only one rebuttal can be active on an audit at a time. Once you have added a rebuttal, the New Rebuttal button is not visible until that rebuttal has been accepted by the auditor.
- The Accepted toggle will only show ON once the auditor has accepted the processor's rebuttal.
Audit History

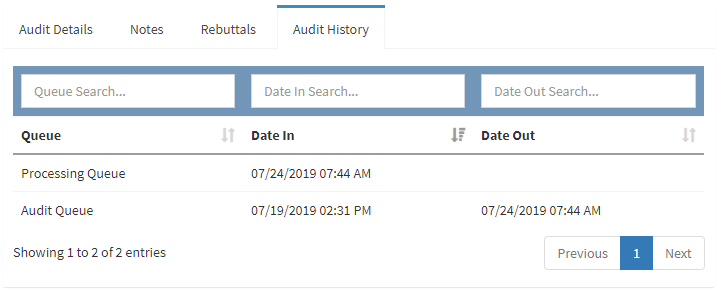
This tab shows the the history tracking of the audit. Each time an audit is sent to a processor or auditor, it is displayed here.
- Use the search/filter boxes at the top of the grid to narrow the list of transactions.
- The column headers can be clicked to sort each column. Click again to sort the opposite direction.
Audit Form

The Audit Form will display in the top right section of the screen. This form can be different for every department and type of audit. They can be custom built by the department admins. The screen shot shown here is only a simple sample of what an audit form could look like. The form was initially filled out by the auditor and is read only to the processor.
The Document

The lower section of the screen displays the original document that was the subject of the audit. This area uses the same universal document viewer as the rest of IWS.
- Info panel and Attachment icons are available to see read only details about the document.
Completing An Audit
As referenced in the sections above, an audit can be completed by adding a note or rebuttal and then clicking the Send To Auditor button.