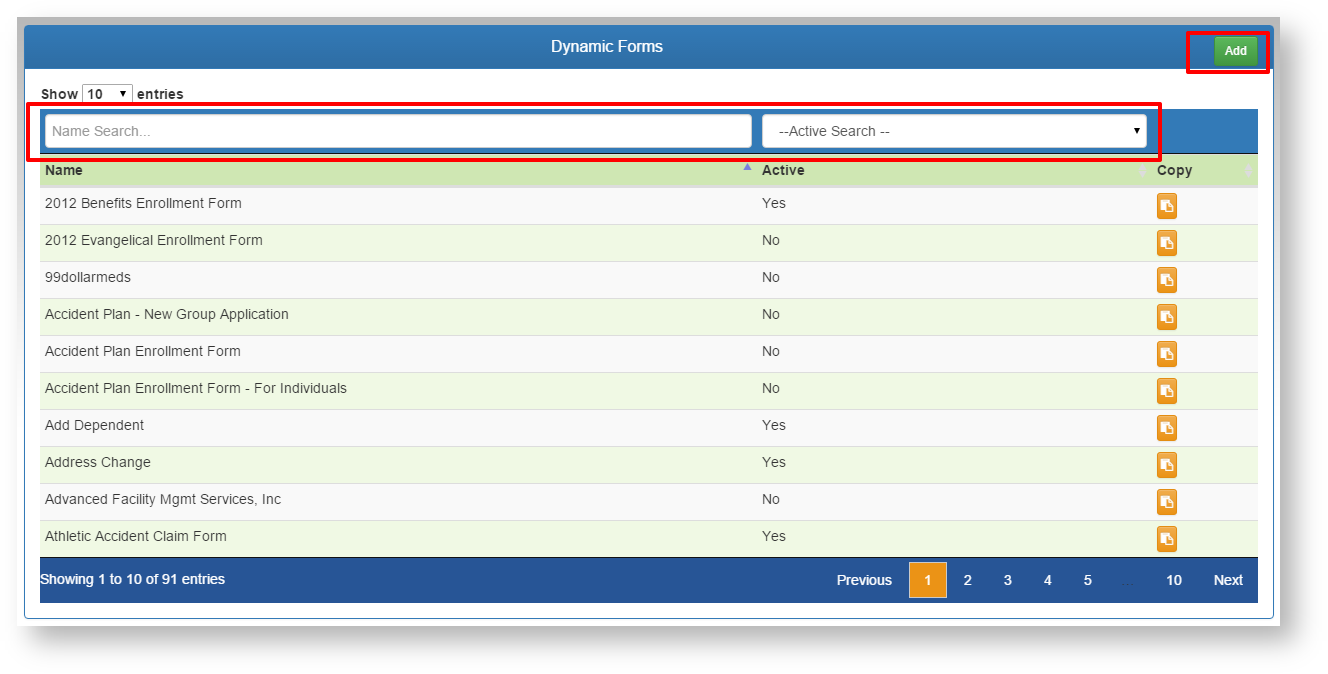
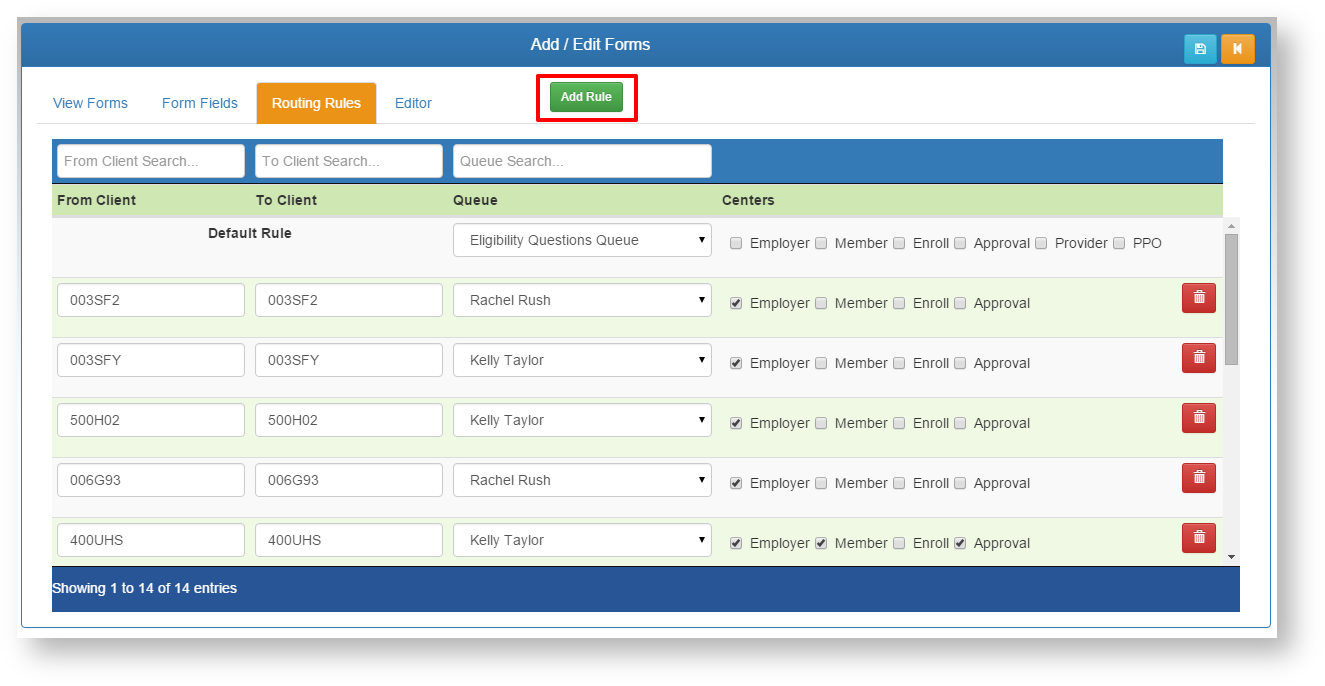
Dynamic Forms - These screens allow the TPA user to build custom forms that can be completed online by members, employers, and providers. Once the user submits a form, it is sent to the TPA Center in the queue designated in the Routing Rules tab.

- Add a new form using the ADD button.
- Search for an existing form to edit using the filters above each column.
- Click on the desired form in the list to edit.

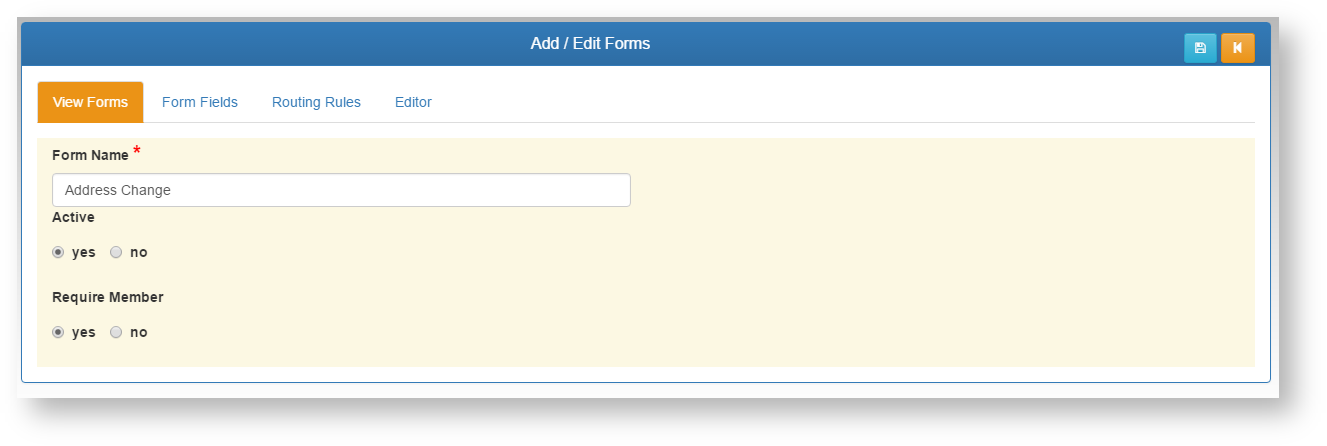
View Forms Tab
- Form Name - Add/Edit the name of the form. This name is what will appear on the list for the end users to select.
- Active - Select if this form is currently active, and will appear for the groups and centers designated. If Active is set to NO, this form will not be visible for any group or center (this overrides all Routing Rules).
- Require Member - If YES is selected, the form will require a member record to be selected by the end user when filled out from the Employer or Provider Centers. If the form is not pertaining to a member directly, then this should be set to NO.

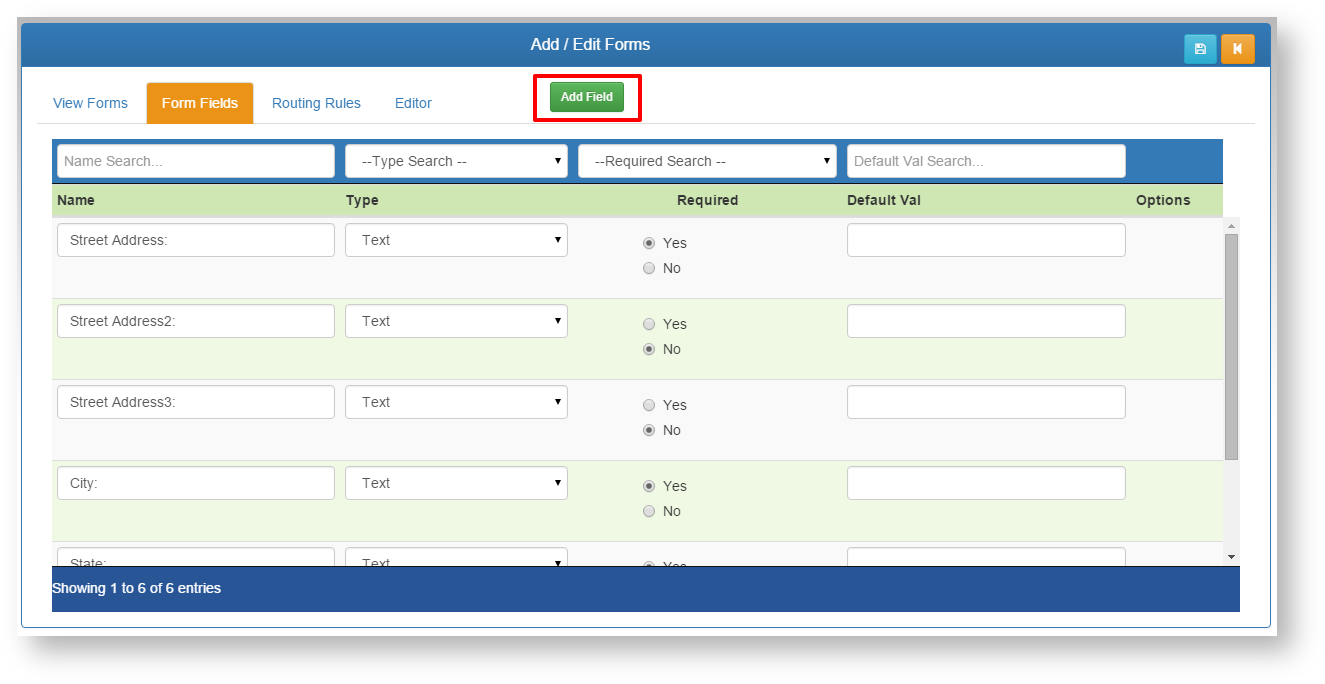
Form Fields Tab - Form fields MUST be setup prior to using the From Editor. Thes are the fields the end user will be filling out on the form itself.
- Add Field - Add a new field.
- Search - search/filter the existing list of fields to find a field to edit.
- Name - Enter the Name of the field itself.
- Type - Enter the type of field. There are a list of options on the type drop down menu. Each type will add automatic validation to that field when the user fills out that field.
- Text - Accepts all standard text and numeric characters.
- Numeric - Accepts only numeric characters.
- Date - Accepts only data date format, and will require the user to enter the data in the proper format (MM/DD/YYYY). When building a custom form, it is a good idea to specify that required date format in the form field label.
