id – Internal Member ID
relationship – Description of the relationship for the member to the employee
securityRelationship – standardizes the relation for WE: self, spouse, child
relationshipCode – internal code from the claim system
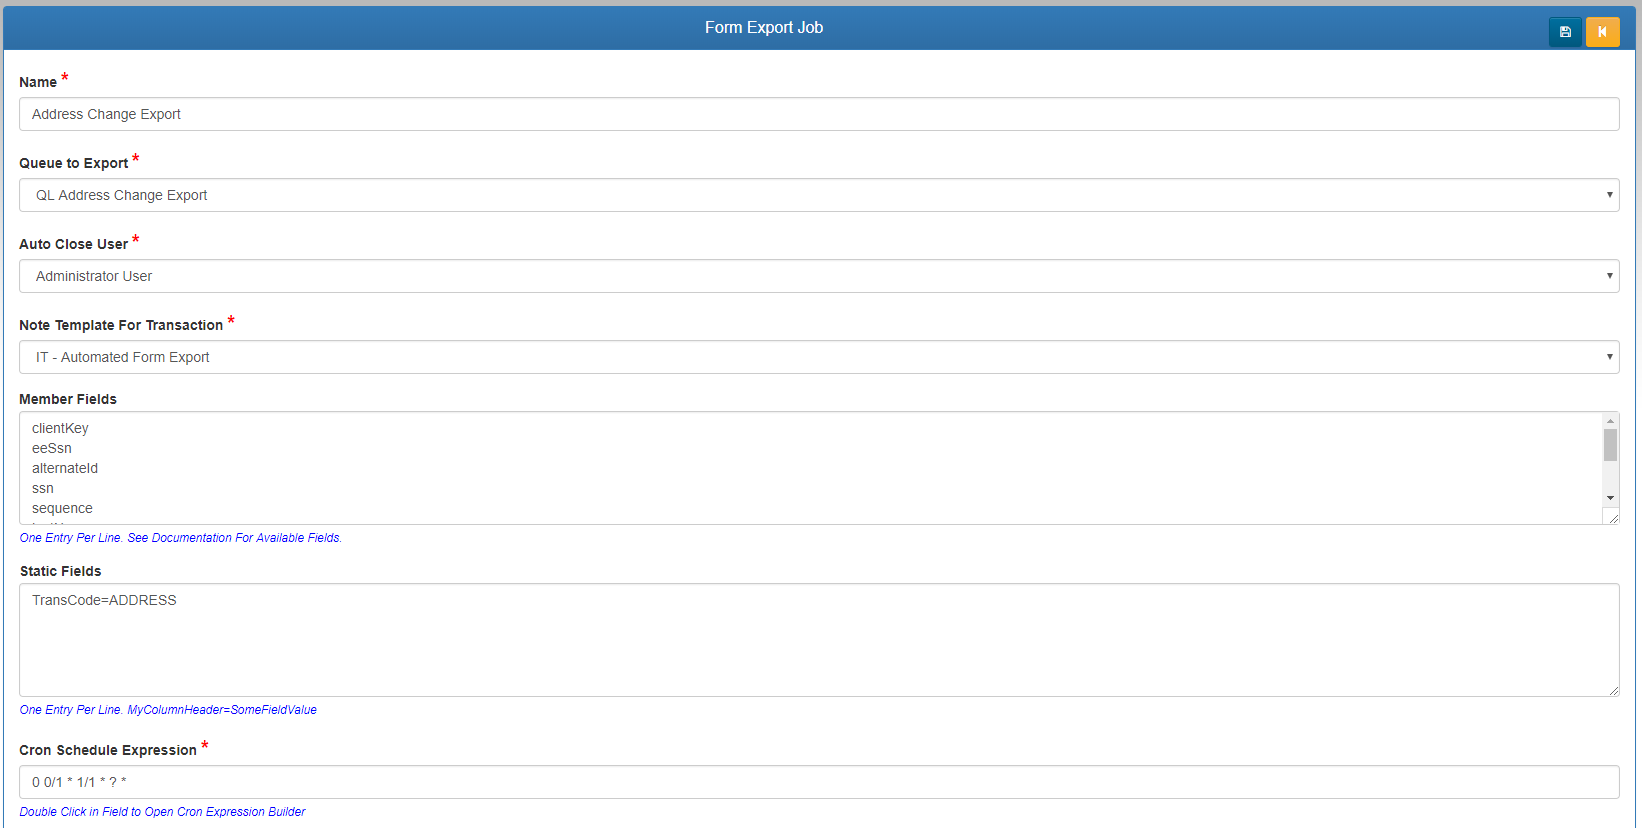
clientKey – Internal group id
ssn – member ssn
eeSsn – employee ssn
alternateId – alternate id of the member
idcardMemKey – member key sent to the id card vendor for viewing the id card
sequence – dependent sequence number
firstName – First name
lastName – last Name
middleInit – middle initial
address1
address2
city
state
zipCode
sex – gender
phone
remarks
department – department code from the claim system
dateOfBirth
dateOfHire – Employee date of hire
status – this is the overall status active or termed, not plan specific
terminated – True when terminated on all plans False otherwise
dbDelimiter – The character that is used to delimit the id or clientKey if they are composite keys