Last Updated v11.3.0
Dynamic Forms
These screens allow the TPA user to build custom forms that can be completed online by members, employers, and providers. Once the user submits a form, it is sent to the TPA Center in the queue designated in the Routing Rules tab.

- Add a new form using the
 button in the top right of the grid.
 - Search for an existing form to edit using the filters above each column.
- Click on the desired form in the list to edit.
- Use the
 button to copy an existing form to a new form. once copied, the new form can be edited and saved under that new name.
View Forms Tab
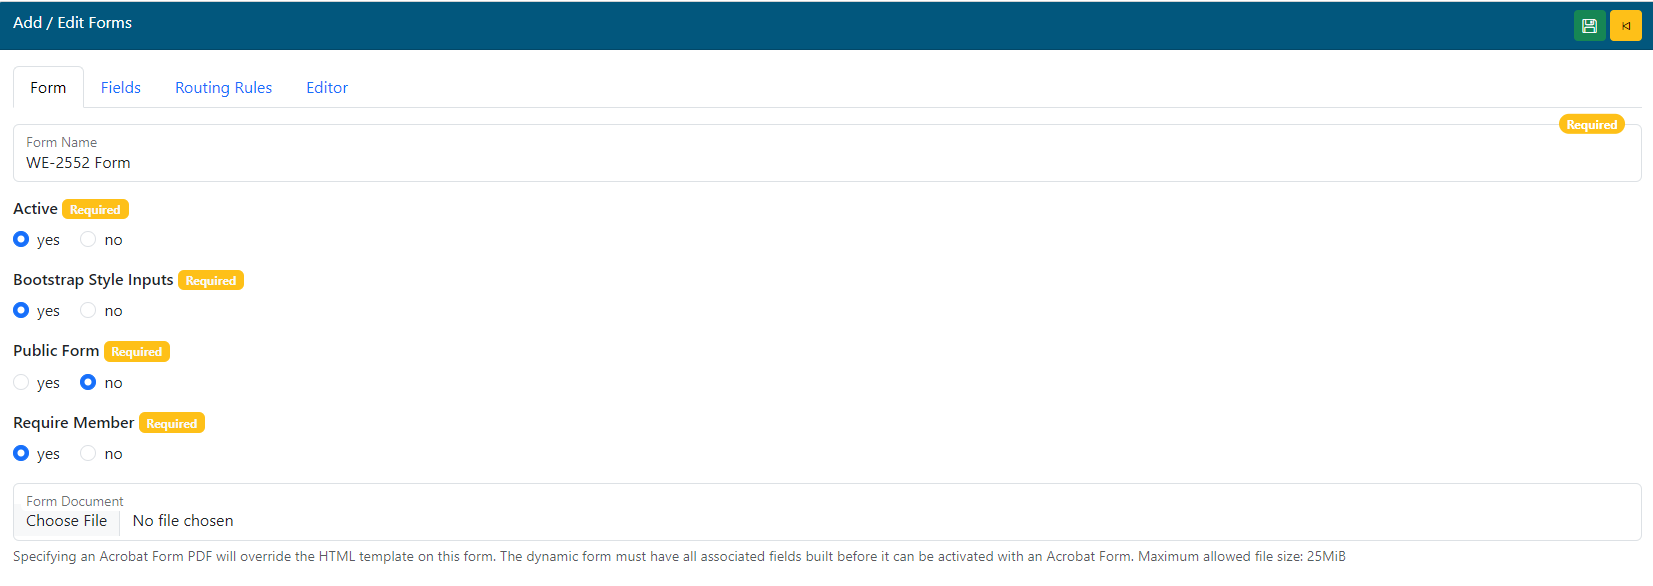
- Form Name - Add/Edit the name of the form. This name is what will appear on the list for the end users to select.
- Active - Select if this form is currently active, and will appear for the groups and centers designated. If Active is set to NO, this form will not be visible for any group or center (this overrides all Routing Rules).
- Bootstrap Style Inputs - This option is used for any new forms built from v5.6.5 forward using the new Bootstrap based form editor. When this option is selected, the forms will automatically use the Bootstrap style labels and fields on the form even if the Editor tab is not used. Labels can be defined on the Form Fields tab for each field.
- By default this option is set to NO on forms built prior to v5.6.5. This is for the older forms that were built in the older editor program.
- ***Do not change this option to YES on older forms or the form layout may become corrupt.
- Public Form - This is a special option that is only used for specific scenarios. This form type is not visible inside the normal Web eXchange centers. It can only be called through a specific web URL and is normally used for data collection via referral from another HealthSmart website or system.
- Example: The HealthSmart PPO Provider lookup website allows members ans providers to find providers in the various HealthSmart networks. That site has a link next to each provider on the search list that allows the user to advise of incorrect provider demographic information. The user clicks a link on that site that is setup to deliver the user to this Web eXchange public form without the need for a login. Form fields can also be pre-populated with data from the referring system if available.
- A separate program that runs on the Web eXchange server allows that data transfer and must be setup and configured for any public form to work properly. Please contact the Web eXchange system administrator for more information. Setup details for this separate program are also available on the restricted HealthSmart Confluence server at: https://documentation.healthsmart.com/x/AgDT
- The public form URL that can be provided to an end user or external system will be displayed under the Public ID field after the form is saved.
- **The Routing Rules tab is disabled if Public Form is selected and a Public Form Queue field is displayed on the View Forms tab to choose the delivery queue for this public form.
- Require Member - If YES is selected, the form will require a member record to be selected by the end user when filled out from the Employer or Provider Centers. If the form is not pertaining to a member directly, then this should be set to NO.
- Form Document - OPTIONAL: if a PDF form is added with this option, it will override the normal dynamic form process and the Editor tab will be disabled.
- Fields that match the PDF form field names will need to be added to the Form Fields tab.
- **Forms with this option added cannot be activated until all matching form fields are present.
- Once a PDF form has been added and saved (even as inactive), a button will appear to "Create Form Fields" and "Delete File".
- Create Form Fields: is this option to have the system automatically pull all form fields from the uploaded PDF and add entries for them in the Form Fields tab. This will save time and still allow specific settings to be set for each form field (read only, prefill, required, etc.)
- Delete File: this option will remove the attached PDF file from the form record. This can be used to remove the existing PDF and add a different PDF or move this form back into normal Dynamic form mode with no PDF. You can also choose a new version of the PDF file without deleting it first by using the Choose File button.
- PDF FORM Transaction ID Insertion (Optional). The system can insert the transaction ID into a field on the PDF form if needed. The PDF form template needs to contain a field called ""we_transaction_id" which will be populated when the form is viewed. It is the responsibility of the PDF to create this as a read only field.
- Fields that match the PDF form field names will need to be added to the Form Fields tab.
Form Fields Tab
**Form fields MUST be setup prior to using the From Editor. These are the fields the end user will be filling out on the form itself.

The Grid (List)
- Add Field - Add a new field.
- Search - Use the filter boxes above each column to search/filter the existing list of fields to find a field to edit.
- Click any Row to open and existing field to edit the details.
- Actions Column Options: (Field order only matters when NOT using the Editor tab to layout the form fields).
 Up - Move the field up one space on the list
 Down - Move the field down one space on the list.
 Move - Move the field to a specific location in the list.
 Delete - Delete this field (only available if the field has not been used on on a live form yet).
Field Add/Edit
- Click any row from the grid list to open and existing field to edit the details or click the Add Field button to open en empty field box.
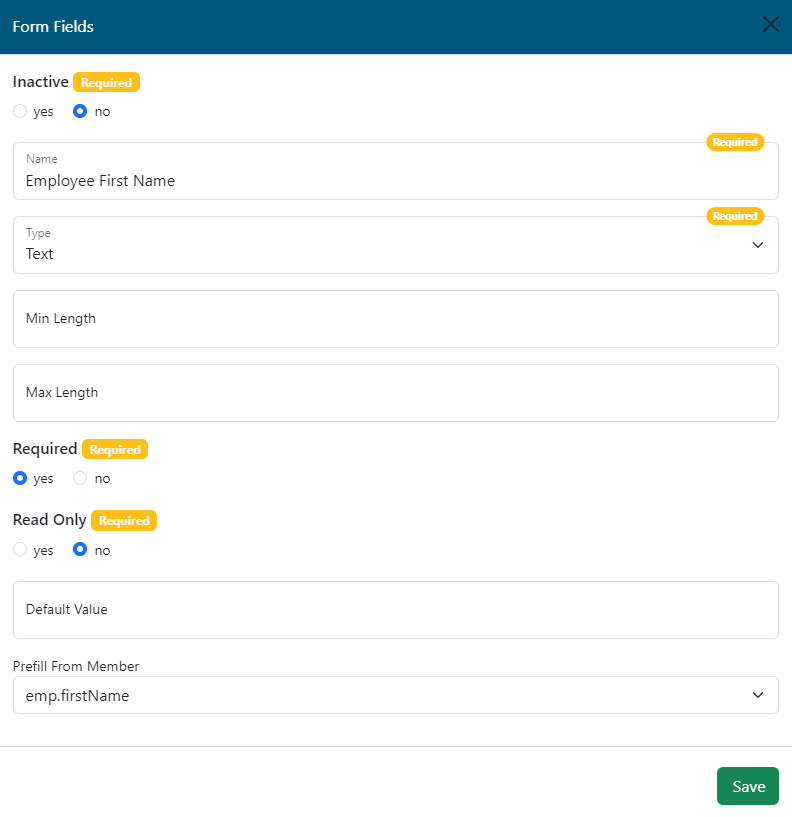
- Inactive - If an existing field needs to be removed from a form, set this option to YES. This will remove the field from new and historical versions of that form.
- If the field being inactivated is still on the form in the Editor tab or on the PDF (if it is a PDF fillable form), a validation error will display when the field is saved. First, remove the field from the Editor or PDF and then inactivate it here.
- Name - Enter the Name of the field itself.
- Field Label (Conditional) - This is used in conjunction with the Bootstrap Style Inputs on the View Forms tab. If this option is set to YES, the label for the field will be required here. This label will display above the field input on the form when presented to the user.
- This field will not be displayed if the Bootsrap Style Inputs option is set to NO on the View Forms tab.
- Type - Enter the type of field. There are a list of options on the type drop down menu. Each type will add automatic validation to that field when the user fills out that field.
- Text - Accepts all standard text and numeric characters.
- Numeric - Accepts only numeric characters.
- Date - Accepts only data date format, and will require the user to enter the data in the proper format (MM/DD/YYYY). When building a custom form, it is a good idea to specify that required date format in the form field label.
- Currency - Accepts only numeric data, and the field will automatically format as currency ($).
- Limited List - This option will allow you to specify a list of items for the user to select from for this field. The SHOW OPTIONS button will be available once Limited List is selected, and saved.
- Show Options - Enter the options to be available in the limited list. Enter between each option. This can be as simple as a Yes/No list, or contain unlimited options to be selected.
- Memo - Accepts all standard text and numeric characters in a larger box with more text space.
- File Attachment - This field type will display a browse button and allow the end user to attach a file to the form.
- The following options are disabled for this field type: Default Value, Read Only, and Prefill From Member.
- Yes/No- A simple selection option that will display a yes/no option box to the end user.
- Field Options
- Min Length (Optional) - Specify the minimum length required when the end user fills out this field.
- Max Length (Optional) - Specify the maximum length required when the end user fills out this field.
- Required - Yes/No. A Yes selection will REQUIRE the end user to complete this field before the form can be submitted. Use this only when you are positive the user will always have this information available to complete the form.
- Read Only - Yes/No. If the field should display data on a pre-filled form, but not be editable, select this option.
- Default Value - Any text entered in this field will show up on the form for the user to see. This can be used to assist the user in knowing what type of data is required in this field. This field is not required, and can be left blank.
- Pre-Fill From member - If the form itself requires a member, this option will be visible for each field. Select from a list of web service fields that can pre-populate the field on the form for the end user.
- SAVE - Click the save button to save the changes and return to the field list.
Routing Rules Tab
This tab allows you to specify what Centers and Client Groups can see this form. Routing rules can be used in any combination to allow flexibility.
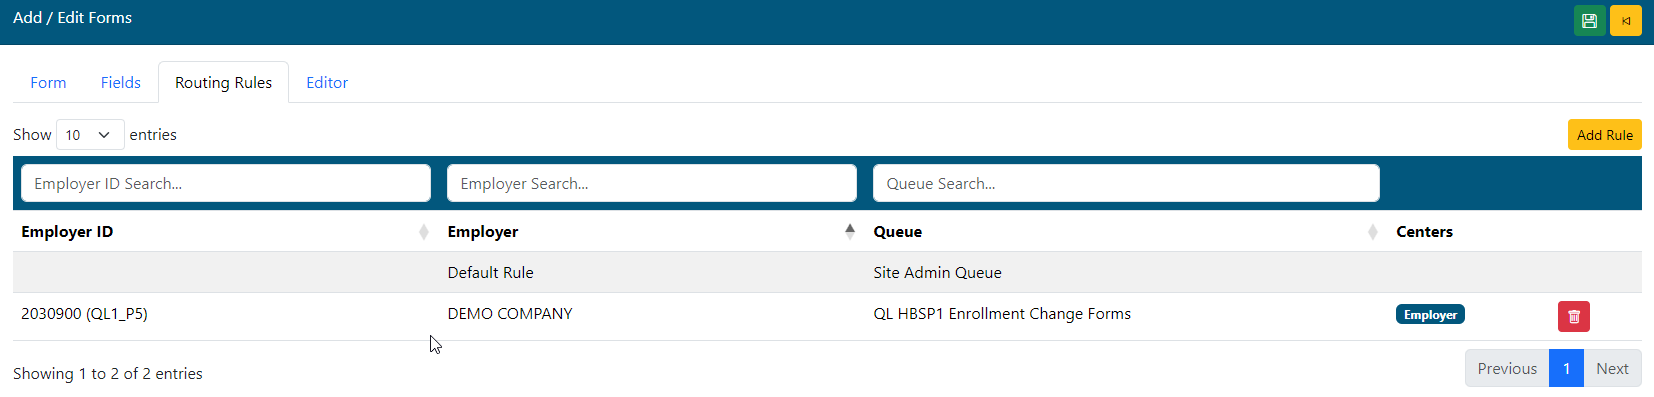
- Search - Search/Filter through existing rules using the search boxes at the top of each field.
- Select - Select any existing rule by clicking it from the list.
- Default Rule - This rule is applied automatically to NOT show for any Clients or Centers. If you want this form to appear for ALL Clients in a specific Center, check that Center's box. The form will now show for all groups in that Center unless overridden by another rule that contains that Client Number.
- Add Rule - Add a new routing rule.
- Delete - Deletes the rule record. This cannot be reversed.
Add/Edit Rule Window
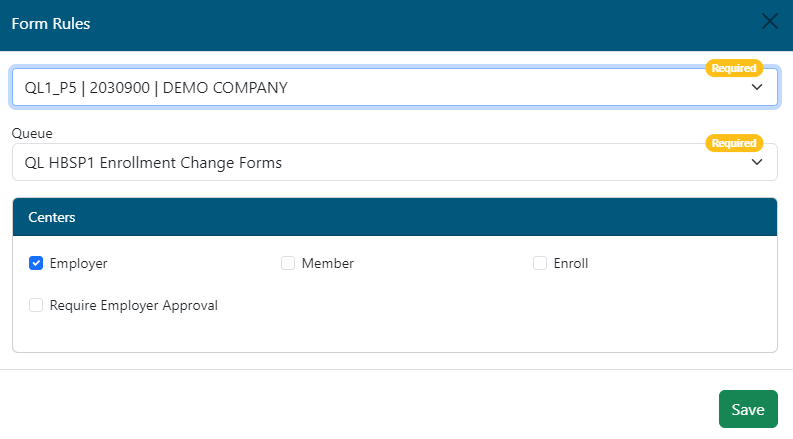
- Employer - Enter the client to apply this rule to. Enter client number or name to search for the correct client. Select it from the list to confirm.
- Queue - The TPA Center queue this form will be routed to after end user completion. This option can be different for each line of the rule set.
- Centers - Check which Centers this rule applies to for the selected client group.
- Require Employer Approval - If this option is selected, the form will be routed to the Employer Center first for approval prior to going to the TPA Queue specified on that rule line. (Verify the Client Group has an Employer Center Account, and is trained on approval processing.)
- Click the SAVE icon to save any changes.
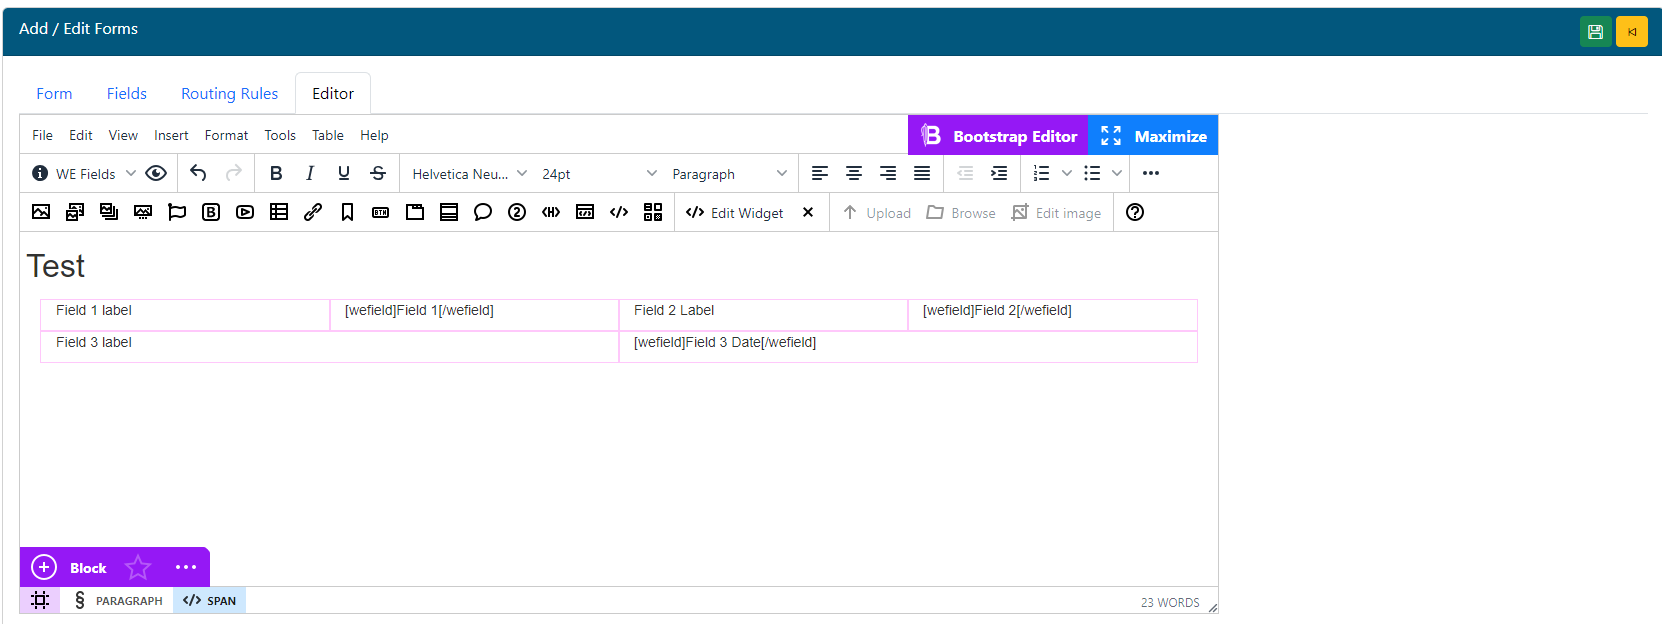
Editor Tab
The editor allows us to create custom form layouts. If no editor items are added, the form will display with one field after another based on the Form Fields tab items. Once a layout is specified on this Editor tab, it will override the default generic form layout, and display what is setup here. Live training is typically provided before working with the Editor.
*** As of v5.6.5: To create fully responsive web forms (forms that resize properly when using smaller device screens like tablets and smart phones), use the Bootstrap Editor button in the top right to add Bootstrap blocks, containers, columns and rows. These should be used instead of standard form tables (tables are still an option on the regular editor toolbar, but should only be used if the Bootstrap options can't handle the setup required). The Bootstrap editor and functions require some knowledge of responsive forms/web design. Please work with the Web eXchange development team to learn how this functionality works prior to modifying or adding new Bootstrap forms. Special training will be provided.
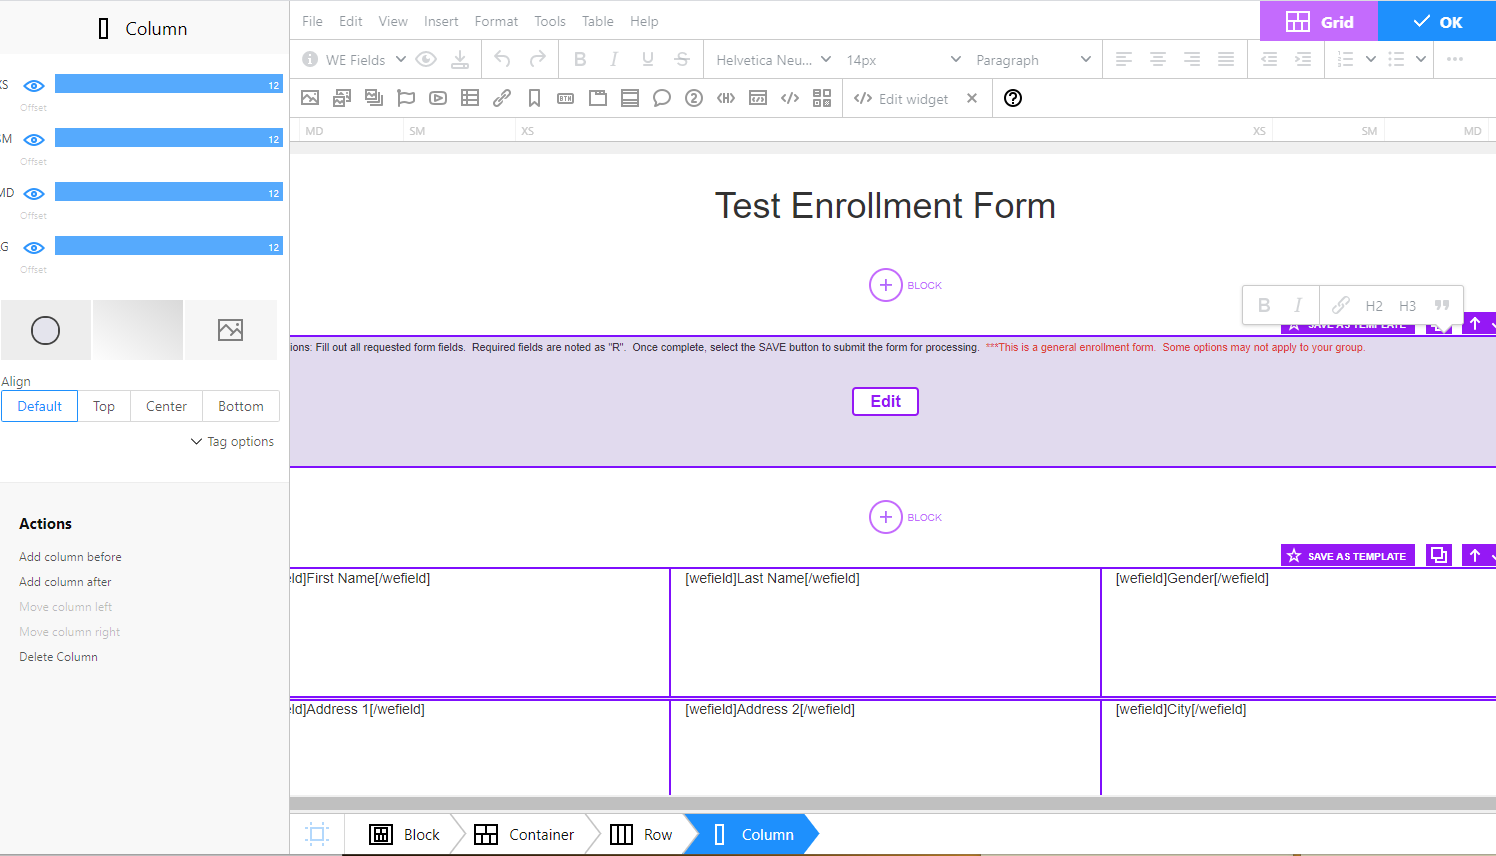
- Once the Bootstrap editos has been setyup to define the blocks, containers, columns and rows, Use the editor toolbar to add fields and other layout elements similar to a Microsoft Word document.
- The WE FIELDS drop down list (shown in the sample above) allows us to insert the fields we created on the From Fields tab.
- Think of this like a Word merge document. In one table column, you can type the label for the field. In the next, you can insert on of our Fields that the end user will see to enter the actual form data.
- A Save icon
 is available on the From toolbar to save changes. The main From record save icon on the top toolbar is also available to save the entire form record and any editor changes.
 - Hover over toolbar icons to see what the option does.
Static Forms
These screens allow the TPA user upload static forms (PDF as an example) for the end user to download and fill out or review off-line.
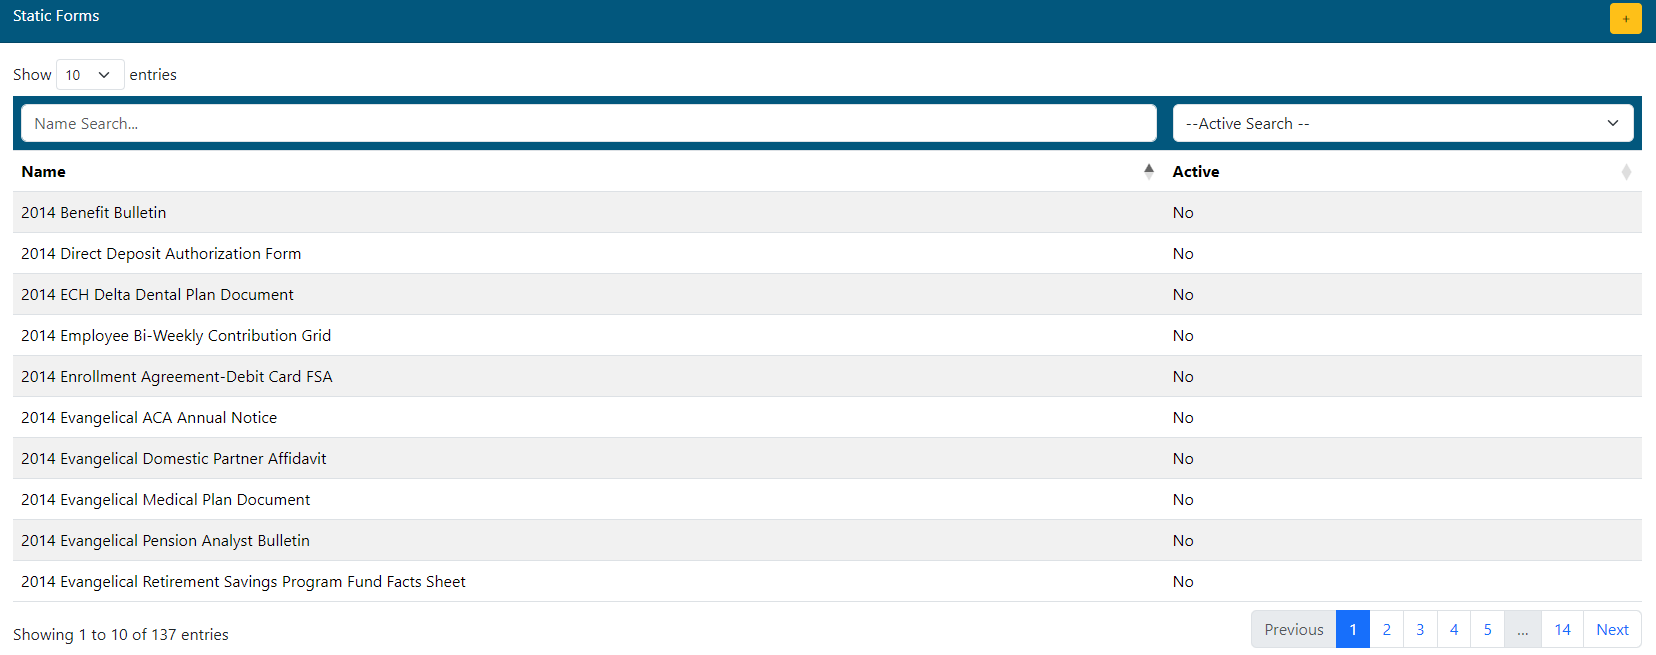
- Select the desired form from the list.
- User filtering options at the top of each column to narrow the list.
View Forms Tab
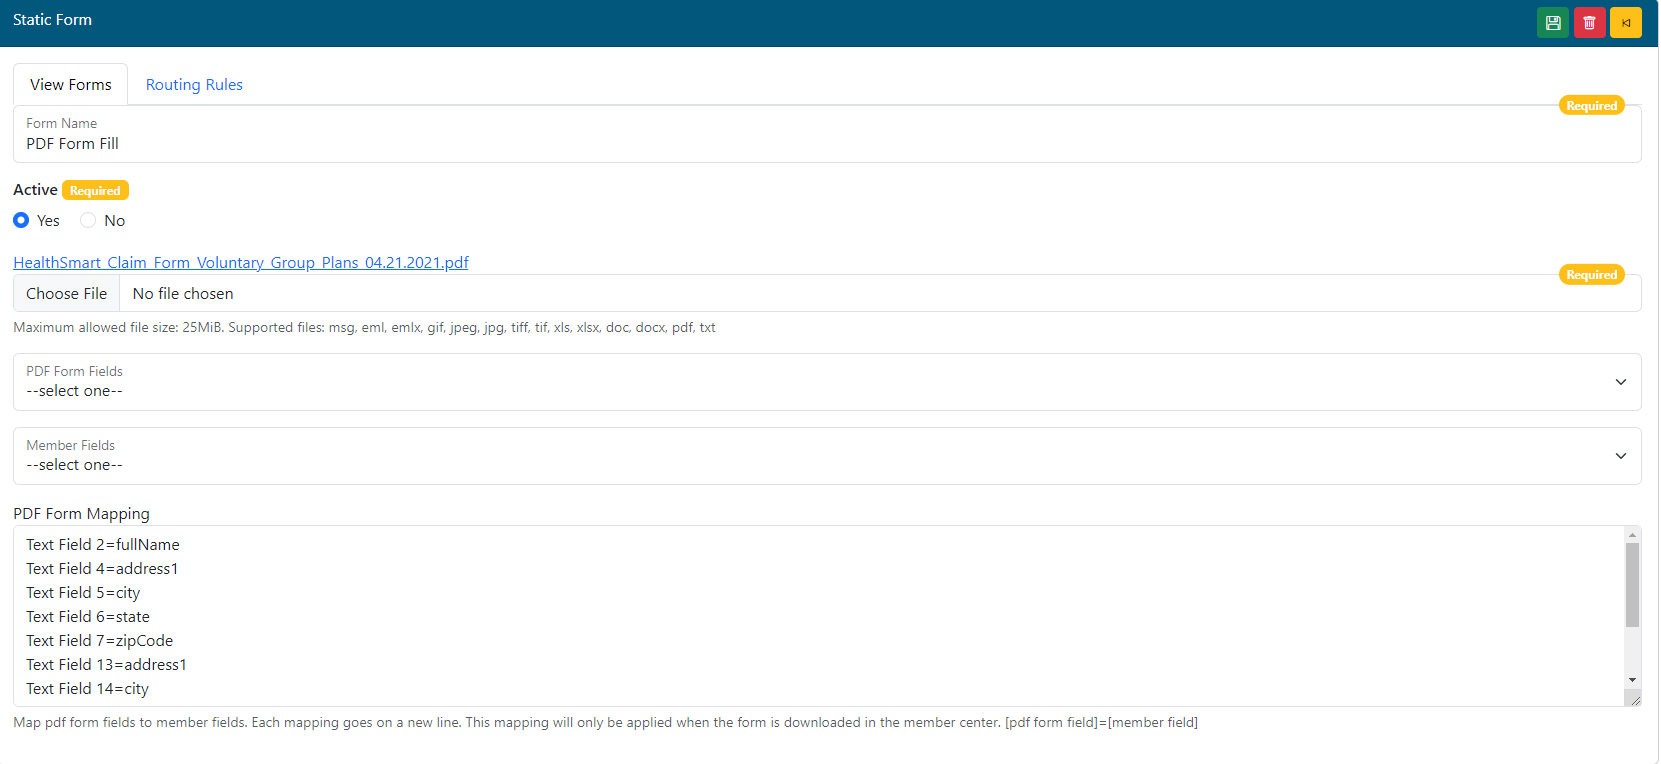
- Form Name - Add/Edit the name of the form. This name is what will appear on the list for the end users to select.
- Form Active - Select if this form is currently active, and will appear for the groups and centers designated. If Active is set to NO, this form will not be visible for any group or center (this overrides all Routing Rules).
- Form Document - Click the Choose File button to browse your computer for the PDF, JPG, etc. file to upload to the system.
- Click the SAVE icon to save any changes.
PDF Form Field Mapping (Added with version 5.6.5):
If a fillable PDF form is uploaded in the Form Document selection, additional options are available on the setup screen as show on the right side of the screenshot above. These fields allow an admin map fields on the PDF to fields in the Web eXchange claim system web services. This will allow the system to automatically fill in the mapped fields for the member when they download the form from the member Center. Examples of fields that can be filled in/mapped are First Name, Last Name, DOB, Address information, etc. Use the fields below to perform the mapping function. **If a standard PDF form is uploaded in the Form Document section above, these conditional fields will NOT be available.
- PDF Form Fields (Conditional) - This list shows all fields on the PDF form that was uploaded. The field names are controlled by the uploaded PDF itself and cannot be changed by Web eXchange. If the field names are not clear, you may need to open the PDF form itself with Adobe Acrobat Standard/Pro to see which field names go with which field on the PDF.
- Once a form field is selected from the list, us the Member Fields list to match up what Web eXchange field data will be mapped into the selected PDF Form Field.
- Member Fields(Conditional) - Select a Web eXchange member web service field that should be used to fill in the data to the selected PDF Form Field.
- Once both fields are selected, that single field mapping will be entered automatically into the PDF Form Mapping box.
- PDF Form Mapping (Conditional) - This text box displays all selected fields that have been mapped. One field set per row.
- The data in this box can be manually changed/added instead of using the select boxes above.
- Click the SAVE icon to save any changes.
Routing Rules Tab
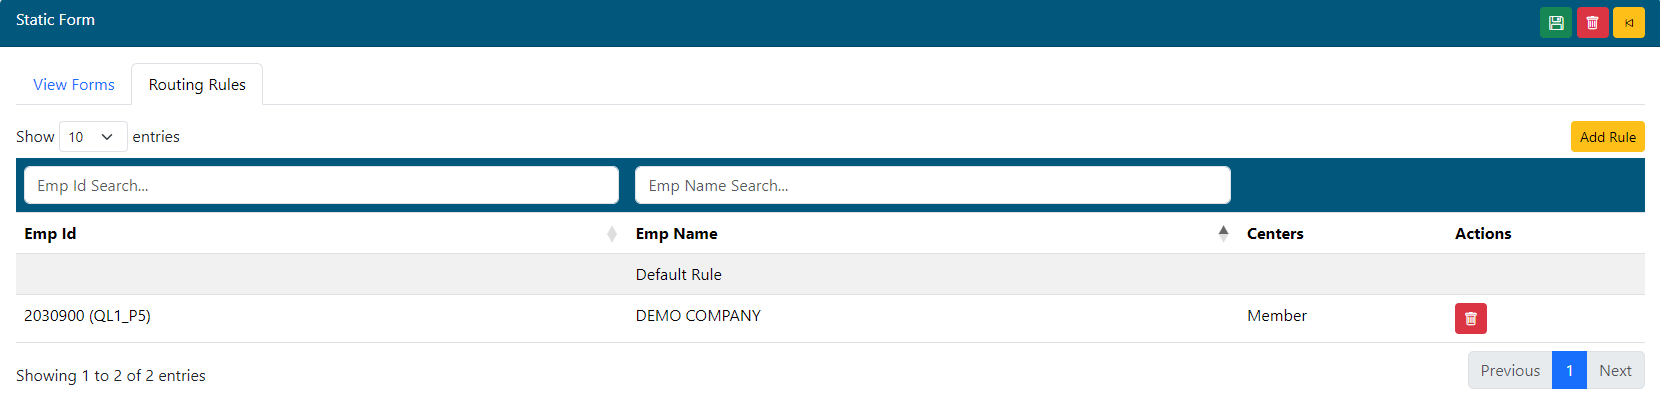
This tab allows you to specify what Centers and Client Groups can see this form. Routing rules can be used in any combination to allow flexibility.
- Search - Search/Filter through existing rules using the search boxes at the top of each field.
- Select - Select any existing rule by clicking it from the list.
- Default Rule - This rule is applied automatically to NOT show for any Clients or Centers. If you want this form to appear for ALL Clients in a specific Center, check that Center's box. The form will now show for all groups in that Center unless overridden by another rule that contains that Client Number.
- Add Rule - Add a new routing rule.
- Delete - Deletes the rule record. This cannot be reversed.
Add/Edit Rule Window
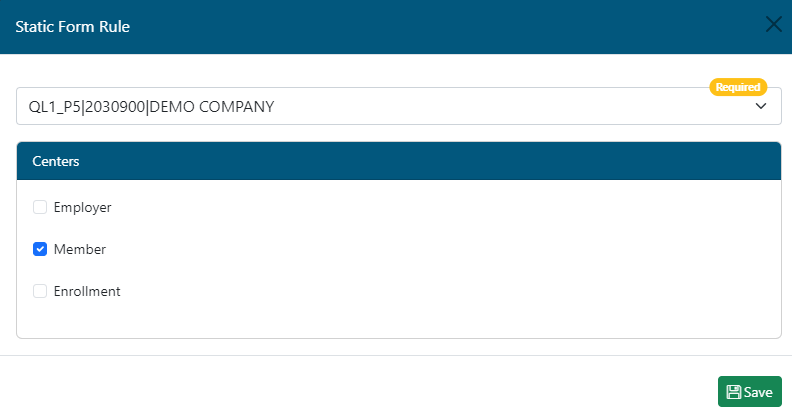
- Employer - Enter the client to apply this rule to. Enter client number or name to search for the correct client. Select it from the list to confirm.
- Centers - Check which Centers this rule applies to for the selected client group.
- Click the SAVE icon to save any changes.