Links
Links can be setup to provide connections to outside websites, or documents that can be downloaded. Depending on the Routing Rules attached, a link can be displayed for Employer and/or Members with several options.
List
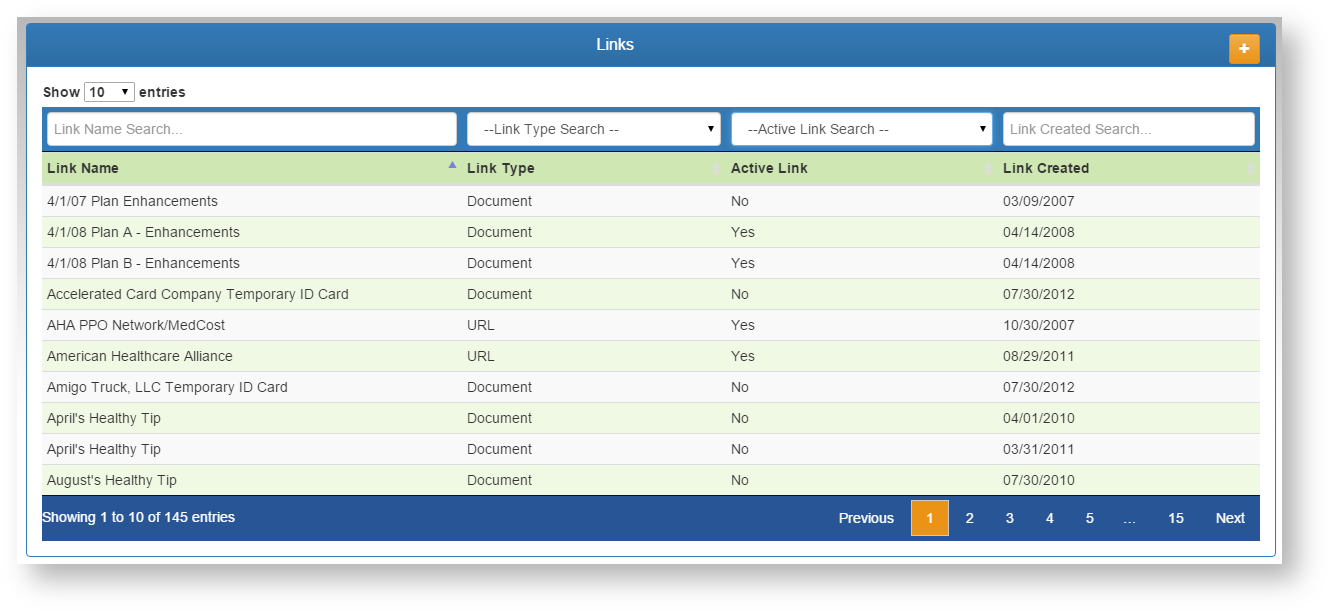
- Use the filter boxes at the top of each column to narrow down the list of existing links.
- Select the desired link to edit by clicking on the row.
- Add a new link using the plus
 button.
Link Detail
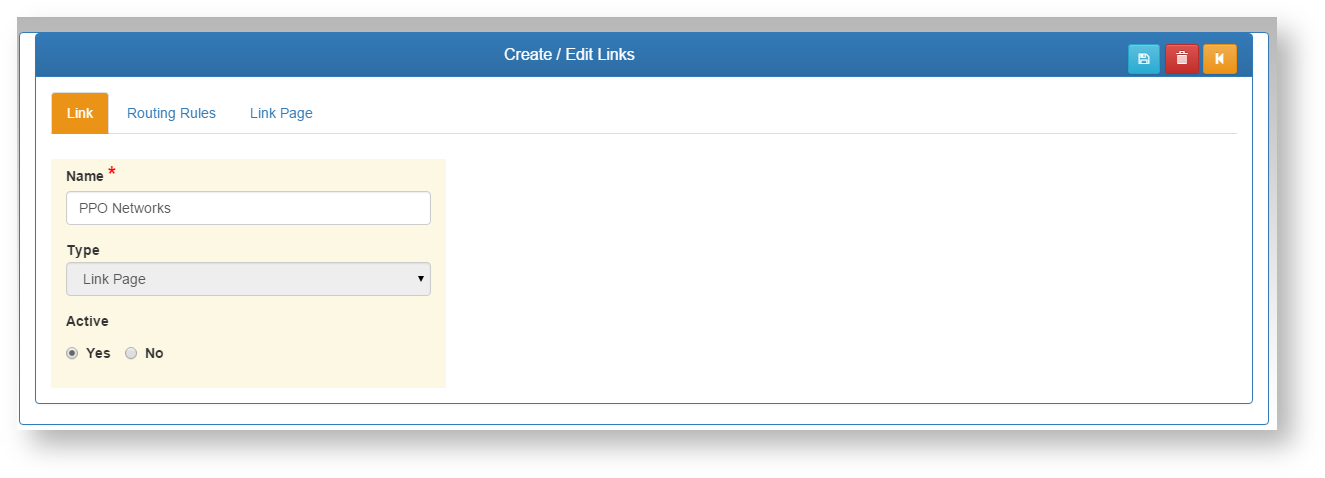
- Add\edit a name for the link. This name will appear on the links bar for any Centers added on the routing rules tab.
- Choose the link Type.
- URL - A link to an outside website.
- Document - A link to a document the user can download.
- Link Page - This will take the end user to a separate page that can display multiple links. Use this option if you can categorize multiple links together rather than making separate Links for each one. This will keep the link bar from being cluttered.
- Active - Chose if this link is active or not. Only active links show on the link bar for users to see.
Routing Rules
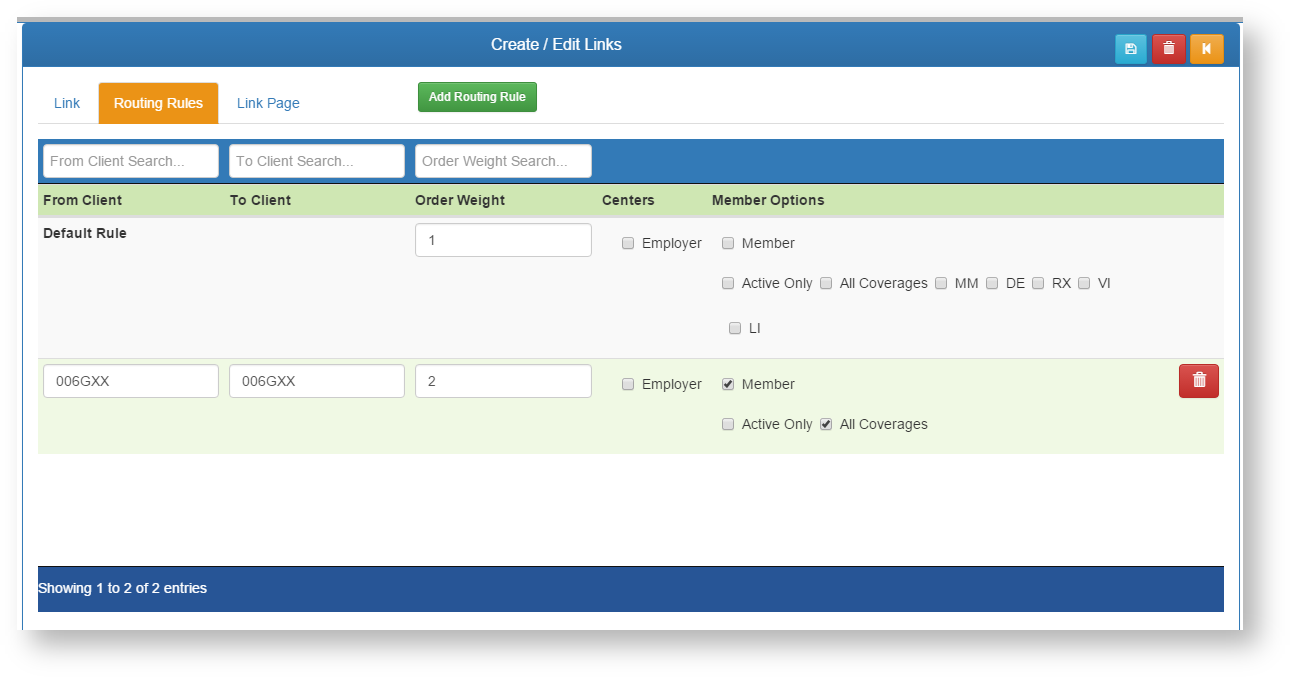
- Default Rule - A default rule is always created by the system when adding a new link. This rule is set with nothing checked, and will keep this link from showing on any Centers until it is modified manually, or until a group based routing rule is added below it.
- If you wish to have this link show for ALL Employers, click the EMPLOYER option.
- If you wish to have this link show for ALL Members, click the MEMBER option.
- If Members are selected, you can chose any of the options listed to restrict which type of members can see the link (Active only, All coverages, or individually selected coverages.). These special options for members can be helpful for showing specific links to only users that have those types of coverages. An example would be showing a link to an outside vision vendor only to those members that have VI (vision) coverage.
- Add Routing Rule - Select this button at the top to add a new routing rule that will override the Default Rule. The Default Rule will remain in effect for any client groups that are not listed in the new rule.
- From and To Client - Enter the client numbers from and through this rule will apply to. This can be one group, or many in a range. The screen shot above shows a rule for one group 006GXX. This rule will override the Default Rule for ONLY the group(s) listed here.
- Order Weight - If there are multiple links setup that a group can see, how high on the list will this rule show. 1 for top of list, 2 for second, and so on.
- Centers - Which Centers will this rule apply to for this group.
- Member options - If you wish to have this link show for ALL Members, click the MEMBER option.
- If Members are selected, you can chose any of the options listed to restrict which type of members can see the link (Active only, All coverages, or individually selected coverages.). These special options for members can be helpful for showing specific links to only users that have those types of coverages. An example would be showing a link to an outside vision vendor only to those members that have VI (vision) coverage.
- Click the SAVE icon to save changes.
Link Page
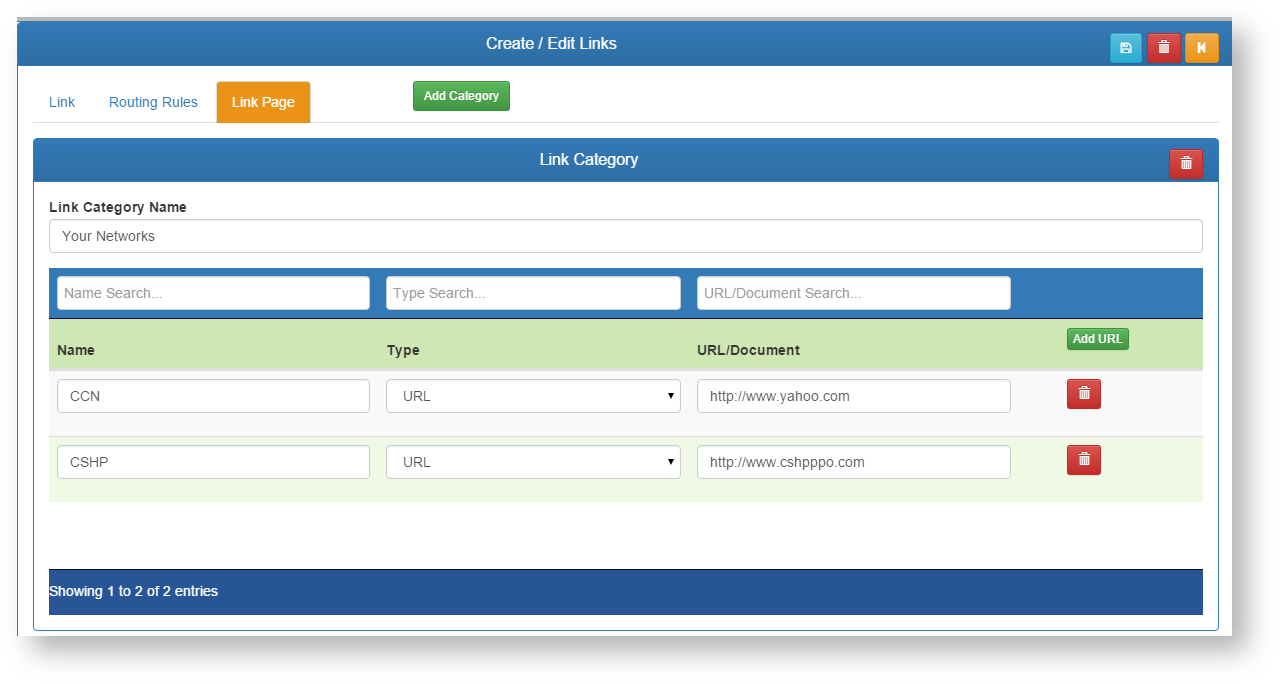
- Add Category - This will add a category to your link page. A category is a grouping of links on the link page. In the screen shot above, our category is "Your Networks". This will group links to the PPO networks available for this link, or groups assigned to the link. You can have multiple categories on one link page.
- Link Category Name - Name the category as you want it to appear on the link page for users.
- Add URL - Click this button to add a new URL link to this category (this button adds a new row to the category for a URL or a document type link).
- Name - Name the link itself.
- Type - Select what type of link this line will contain (URL or Document).
- URL/Document - Enter the URL (ex: http://www.google.com) or browse for the document to attach.
- Delete - Delete a row.
- Primary Delete - Top Menu - This will delete the entire link page.
- Click the SAVE icon to save changes.
Related Pages