Dynamic Forms - These screens allow the TPA user to build custom forms that can be completed online by members, employers, and providers. Once the user submits a form, it is sent to the TPA Center in the queue designated in the Routing Rules tab.
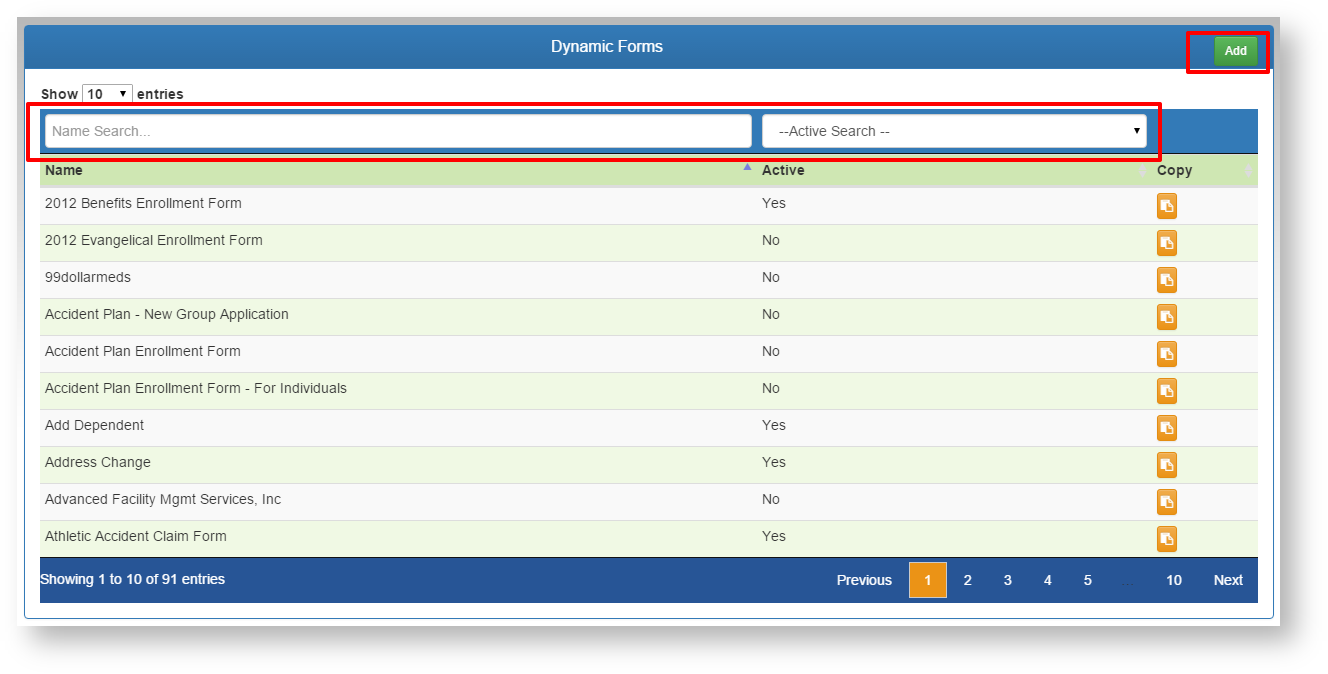
- Add a new form using the ADD button.
- Search for an existing form to edit using the filters above each column.
- Click on the desired form in the list to edit.
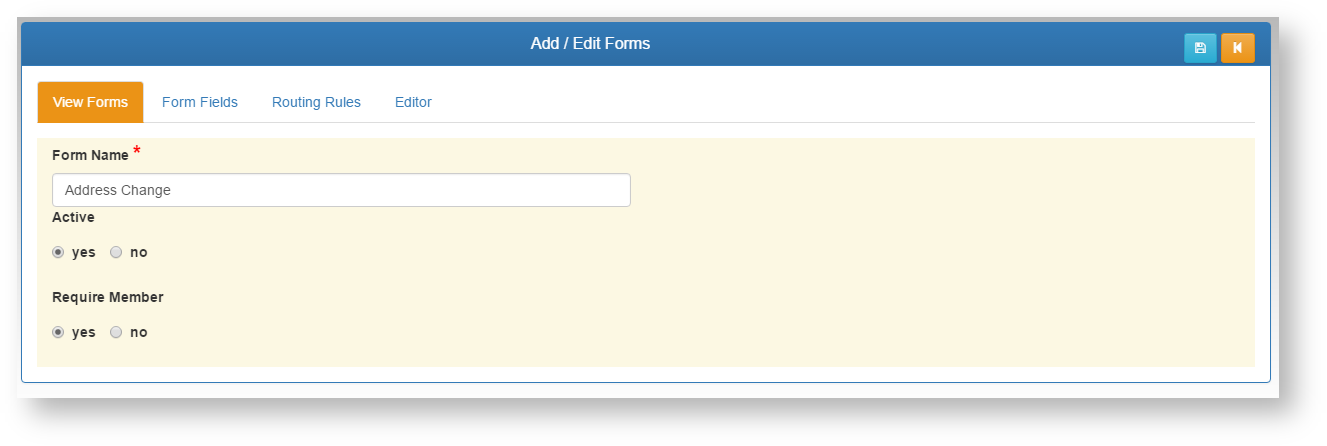
View Forms Tab
- Form Name - Add/Edit the name of the form. This name is what will appear on the list for the end users to select.
- Active - Select if this form is currently active, and will appear for the groups and centers designated. If Active is set to NO, this form will not be visible for any group or center (this overrides all Routing Rules).
- Require Member - If YES is selected, the form will require a member record to be selected by the end user when filled out from the Employer or Provider Centers. If the form is not pertaining to a member directly, then this should be set to NO.
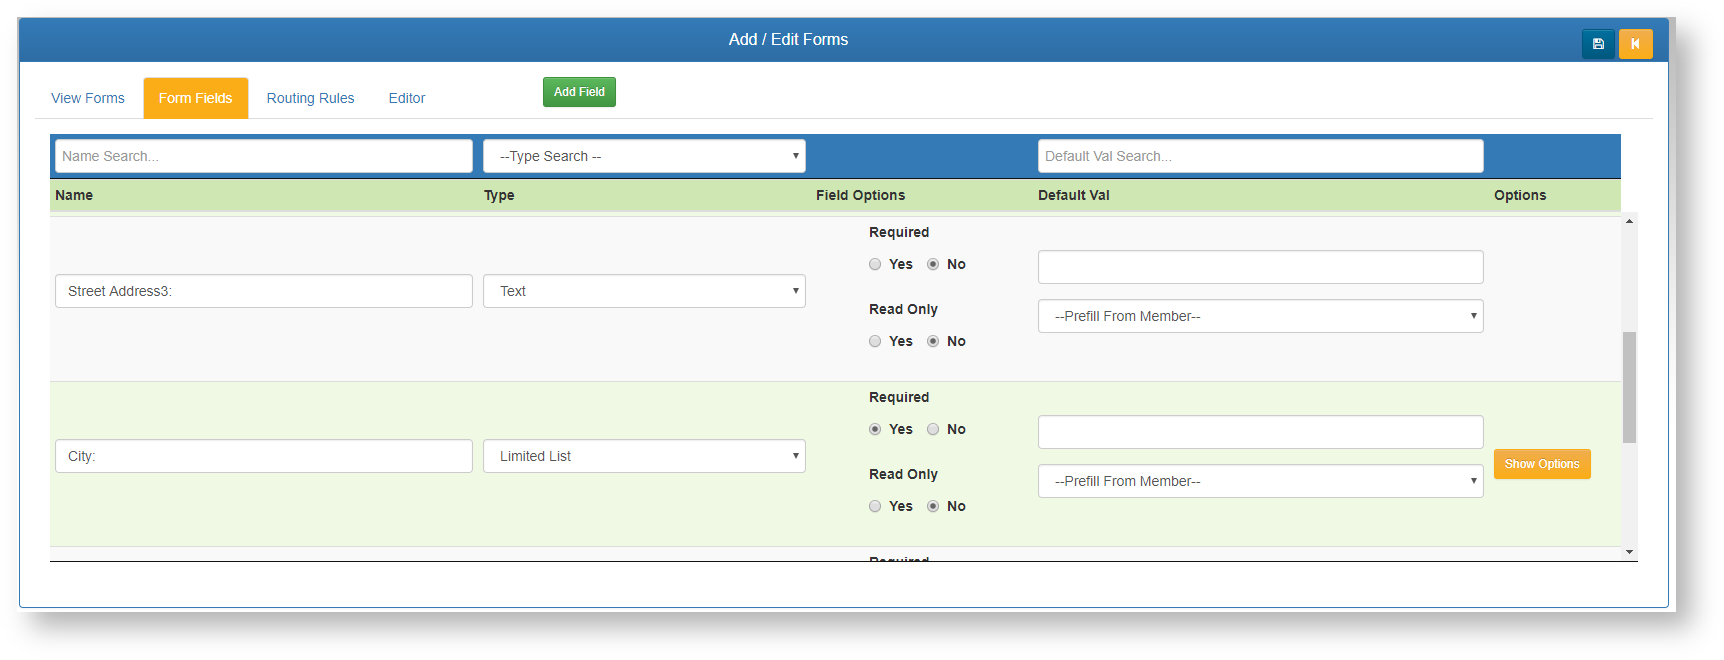
Form Fields Tab - Form fields MUST be setup prior to using the From Editor. These are the fields the end user will be filling out on the form itself.
- Add Field - Add a new field.
- Search - search/filter the existing list of fields to find a field to edit.
- Name - Enter the Name of the field itself.
- Type - Enter the type of field. There are a list of options on the type drop down menu. Each type will add automatic validation to that field when the user fills out that field.
- Text - Accepts all standard text and numeric characters.
- Numeric - Accepts only numeric characters.
- Date - Accepts only data date format, and will require the user to enter the data in the proper format (MM/DD/YYYY). When building a custom form, it is a good idea to specify that required date format in the form field label.
- Currency - Accepts only numeric data, and the field will automatically format as currency ($).
- Limited List - This option will allow you to specify a list of items for the user to select from for this field. The SHOW OPTIONS button will be available once Limited List is selected, and saved.
- Show Options - Enter the options to be available in the limited list. Enter between each option. This can be as simple as a Yes/No list, or contain unlimited options to be selected.
- Field Options
- Required - Yes/No. A Yes selection will REQUIRE the end user to complete this field before the form can be submitted. Use this only when you are positive the user will always have this information available to complete the form.
- Read Only - Yes/No. If the field should display data on a pre-filled form, but not be editable, select this option.
- Default Value - Any text entered in this field will show up on the form for the user to see. This can be used to assist the user in knowing what type of data is required in this field. This field is not required, and can be left blank.
- Pre-Fill From member - If the form itself requires a member, this option will be visible for each field. Select from a list of web service fields that can pre-populate the field on the form for the end user.
- Options - See Show Options under Type-Limited List above.
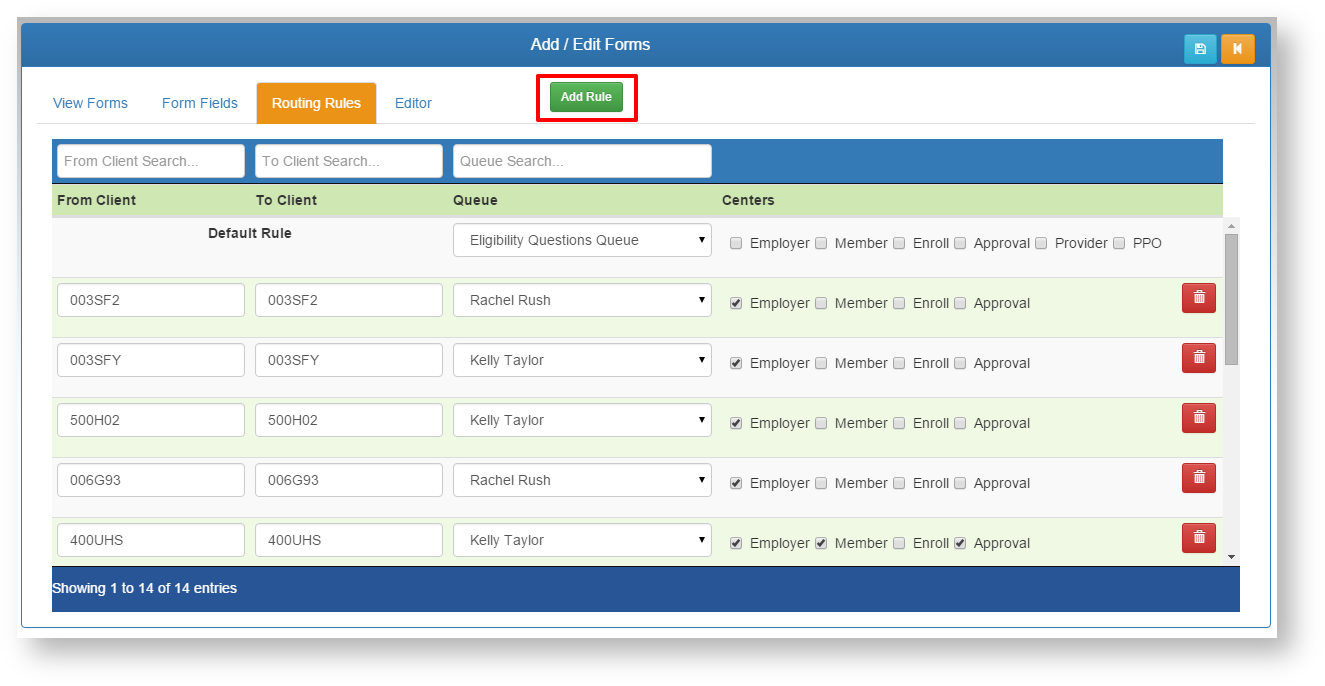
Routing Rules Tab - This tab allows you to specify what Centers and Client Groups can see this form. Routing rules can be used in any combination to allow flexibility.
- Add Rule - Add a new routing rule.
- Search - Search/Filter through existing rules using the search boxes at the top of each field.
- Default Rule - This rule is applied automatically to NOT show for any Clients or Centers. If you want this form to appear for ALL Clients in a specific Center, check that Center's box. The form will now show for all groups in that Center unless overidden by another rule that contains that Client Number.
- From Client and To Client - Enter the range of clients to apply this line of the rule to. The Client key is required in this field. This can be from and to the same client number for a single client.
- For the ECI HealthPac system, the Underwriter and Group number are to be entered with no spaces. (See screen shot above.)
- Queue - The TPA Center queue this form will be routed to after end user completion. This option can be different for each line of the rule set.
- Centers - Check which Centers this rule applies to for that Client Group Range.
- Approval - If this option is selected, the form will be routed to the Employer Center first for approval prior to going to the TPA Queue specified on that rule line. (Verify the Client Group has an Employer Center Account, and is trained on approval processing.)
- Delete - Deletes the rule line. This cannot be reversed.
Editor Tab - Help for this will be written once the final form editor is in place.
Static Forms - These screens allow the TPA user upload static forms (PDF as an example) for the end user to download and fill out or review off-line.

- Select the desired form from the list.
- User filtering options at the top of each column to narrow the list.
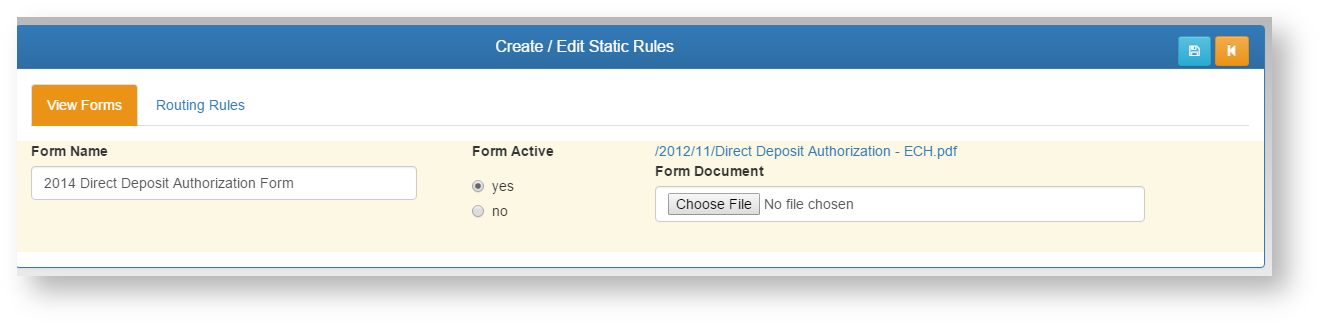
View Forms Tab
- Form Name - Add/Edit the name of the form. This name is what will appear on the list for the end users to select.
- Active - Select if this form is currently active, and will appear for the groups and centers designated. If Active is set to NO, this form will not be visible for any group or center (this overrides all Routing Rules).
- Form Document - Click the Choose File button to browse your computer for the PDF, JPG, etc. file to upload to the system.
- Click the SAVE icon to save any changes.
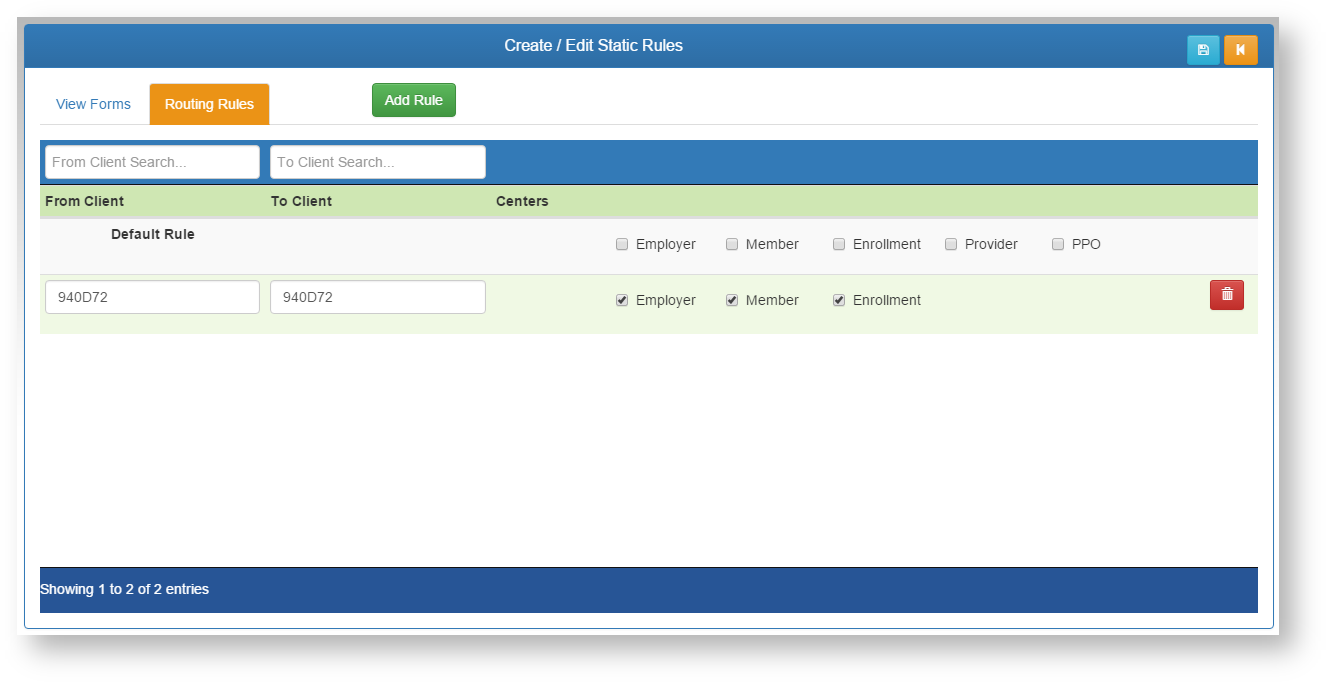
Routing Rules Tab - This tab allows you to specify what Centers and Client Groups can see this form. Routing rules can be used in any combination to allow flexibility.
- Add Rule - Add a new routing rule.
- Search - Search/Filter through existing rules using the search boxes at the top of each field.
- Default Rule - This rule is applied automatically to NOT show for any Clients or Centers. If you want this form to appear for ALL Clients in a specific Center, check that Center's box. The form will now show for all groups in that Center unless overidden by another rule that contains that Client Number.
- From Client and To Client - Enter the range of clients to apply this line of the rule to. The Client key is required in this field. This can be from and to the same client number for a single client.
- For the ECI HealthPac system, the Underwriter and Group number are to be entered with no spaces. (See screen shot above.)
- Centers - Check which Centers this rule applies to for that Client Group Range.
- Delete - Deletes the rule line. This cannot be reversed.
Related Pages